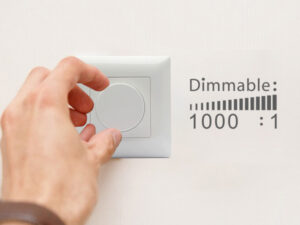
LED 스트립 조명 배선은 어렵게 느껴질 수 있습니다. 하지만 올바른 지침을 따르면 간단한 과정입니다. 공간을 아름답게 꾸밀 수 있습니다. DIY 애호가, 분위기를 더하고 싶은 집주인, 새로운 프로젝트를 진행하는 전기 기술자를 위한 가이드입니다. 이 가이드는 배선 작업을 간소화합니다.
LED 스트립 조명을 배선하려면 먼저 스트립의 유형(단색, RGB 또는 RGBW)을 확인합니다. 양극선과 음극선을 전원 공급 장치 또는 컨트롤러의 해당 단자에 연결합니다. RGB 스트립의 경우 색상(빨간색, 녹색, 파란색)을 해당 단자에 맞춥니다. 모든 연결이 단단히 고정되었는지 확인하고 포함된 배선도를 따라 정확한 지침을 따르세요.
다양한 유형의 LED 스트립 조명 배선에 대해 자세히 알아봅시다. 이를 통해 올바르게 배선할 수 있는 지식과 자신감을 얻을 수 있습니다.
- 병렬 연결 이해: 단순화
- 전압 강하: 간단한 설명
- PWM 증폭기: 복잡한 것을 단순하게 바꾸기
- LED 스트립 조명의 종류
- 단일 컬러 LED 스트립 조명 배선 방법
- 디밍이 불가능한 LED 드라이버로 단색 LED 스트립 조명 배선하기
- 디머블 LED 드라이버로 단색 LED 스트립 조명 배선하기
- LED 컨트롤러로 단일 컬러 LED 스트립 조명 배선하기
- DMX512 디코더로 단일 컬러 LED 스트립 조명 배선하기
- 조정 가능한 흰색 LED 스트립 조명 배선 방법
- 디머블 LED 드라이버를 사용한 배선 조정 가능한 흰색 LED 스트립 조명
- LED 컨트롤러로 조정 가능한 백색 LED 스트립 조명 배선하기
- DMX512 디코더를 사용한 배선 조정 가능한 흰색 LED 스트립 조명
- 2선 가변형 백색 LED 스트립 조명
- RGB LED 스트립 조명 배선 방법
- RGBW LED 스트립 조명 배선 방법
- RGB 및 CCT LED 스트립 조명 배선 방법
- 어드레서블 LED 스트립 조명 배선 방법
- SPI 어드레서블 LED 스트립 조명 배선 방법
- 데이터 채널만 있는 SPI 주소 지정 가능 LED 스트립 조명
- 데이터 및 클록 채널이 있는 SPI 주소 지정 가능 LED 스트립 조명
- 데이터 및 백업 데이터 채널이 있는 SPI 주소 지정 가능 LED 스트립 조명
- DMX512 어드레서블 LED 스트립 조명 배선 방법
- 자주 묻는 질문
- 결론
- 닫기
병렬 연결 이해: 단순화
병렬 연결은 LED 스트립 조명에서 매우 중요합니다. 스트립의 각 세그먼트는 직렬로 연결되므로 작동 전압이 합산되어 필요한 더 높은 전압을 제공합니다. 모든 세그먼트가 병렬로 연결되어 동일한 전압을 받지만 스트립의 길이에 따라 전류 소모량이 증가합니다. 병렬 연결을 사용합니다. 병렬 연결은 각 스트립 세그먼트가 일정한 전압을 공급받도록 보장합니다. 이렇게 하면 밝기가 고르지 않거나 깜박이는 등의 문제를 방지할 수 있습니다. 이 설정은 긴 LED 스트립을 사용할 때 중요합니다. 조명을 안정적이고 균일하게 유지합니다. 병렬 배선의 기본 사항을 이해하면 LED 조명 설치의 효과와 안정성을 크게 향상시킬 수 있습니다.


전압 강하: 간단한 설명
전압 강하는 스트립 끝의 전압이 시작보다 낮을 때 발생합니다. 이로 인해 끝 부분의 LED가 어두워질 수 있습니다. 전압 강하를 완화하려면 더 두꺼운 전선이나 더 짧은 스트립을 사용하거나 스트립을 따라 여러 지점에 전원을 주입하세요. 특히 장시간 사용할 경우 전압 강하를 최소화하려면 설치를 신중하게 계획하는 것이 중요합니다. 한 가지 좋은 방법은 파워 부스터 또는 증폭기를 사용하는 것입니다. 일정한 간격으로 사용하세요. 이는 스트립 전체에 일정한 전압을 유지하는 데 도움이 됩니다. 또한 충분한 용량의 더 나은 전원 공급 장치를 선택하는 것도 전압 강하의 위험을 줄일 수 있습니다. 전압 강하를 이해하고 해결하면 LED 스트립 조명이 잘 작동하는지 확인할 수 있습니다. 전체 설치에 걸쳐 균일한 조명을 제공할 수 있습니다.
PWM 증폭기: 복잡한 것을 단순하게 바꾸기
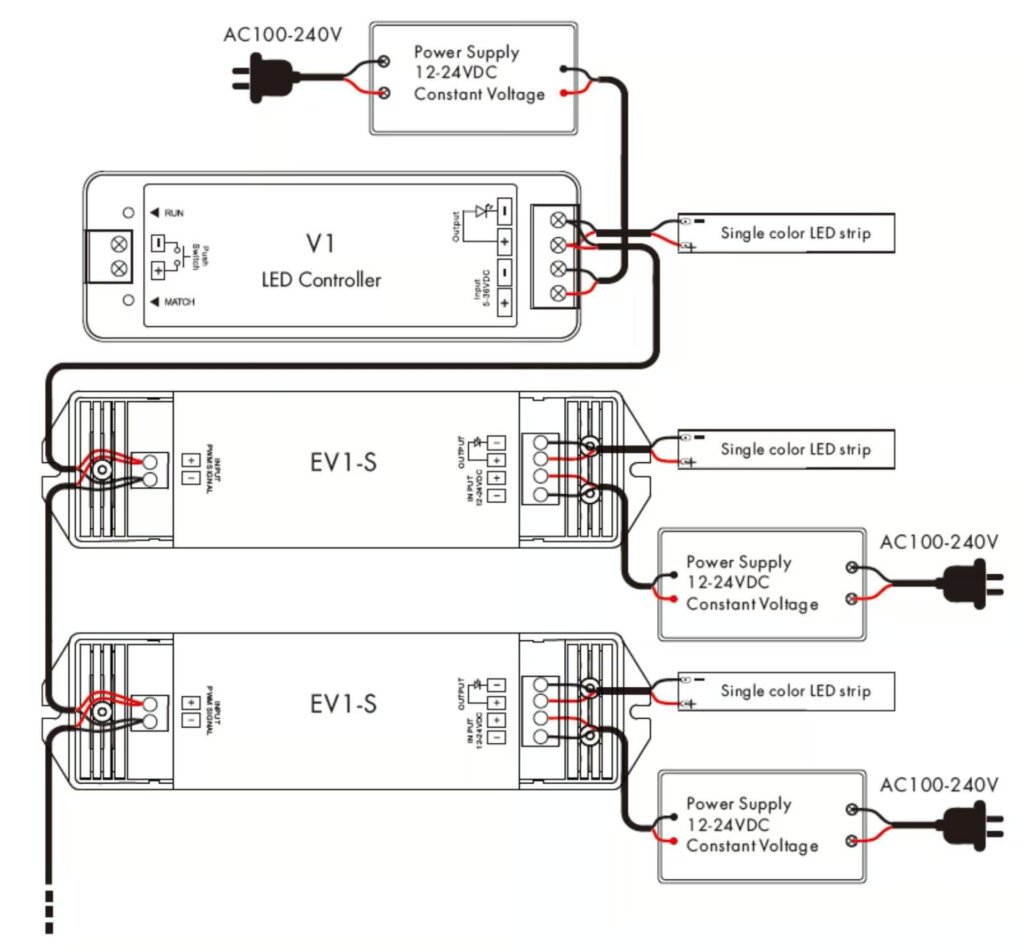
펄스 폭 변조(PWM) 증폭기는 LED 스트립의 신호를 증폭하여 긴 스트립에서 일정한 밝기를 유지할 수 있도록 합니다. 전원 신호가 강하게 유지되도록 하여 디밍이나 깜박임을 방지합니다. PWM 증폭기는 대규모 설치에 유용합니다. 광 출력을 균일하게 유지하는데 이는 매우 중요합니다. 이 증폭기는 PWM 신호를 재생성합니다. LED 스트립의 유효 범위를 확장합니다. 이를 통해 모든 섹션에 적절한 전압과 전류를 공급할 수 있습니다. PWM 증폭기를 설치하는 방법은 간단합니다. 설정에 추가하면 됩니다. PWM 증폭기를 올바르게 배치하고 설정하면 LED 스트립 조명을 크게 개선할 수 있습니다. 성능과 수명을 향상시킬 수 있습니다.
LED 스트립 조명의 종류
LED 스트립 조명은 단색, RGB(빨간색, 녹색, 파란색), RGBW(빨간색, 녹색, 파란색, 흰색) 및 조정 가능한 흰색 등 다양한 유형으로 제공됩니다. 각 유형마다 다른 배선과 컨트롤러가 필요합니다. 단색 스트립은 양극과 음극 연결용 전선 두 개만 있으면 되는 가장 간단한 방식입니다. RGB 스트립은 3개의 색상 채널을 추가하므로 색상을 혼합하려면 컨트롤러가 필요합니다. RGBW 스트립에는 미묘한 조명 옵션을 위한 추가 흰색 채널이 포함되어 있습니다. 조정 가능한 백색 스트립은 색온도를 조절할 수 있어 따뜻한 색부터 차가운 색까지 다양한 백색광을 제공합니다. 이러한 LED 스트립 유형 간의 차이점을 알면 필요에 맞는 제품을 선택하는 데 도움이 될 수 있습니다. 또한 적절한 설정과 사용도 보장합니다.
단일 컬러 LED 스트립 조명 배선 방법
디밍이 불가능한 LED 드라이버로 단색 LED 스트립 조명 배선하기
디밍이 불가능한 LED 드라이버의 경우 스트립의 양극 와이어를 드라이버의 양극 단자에 연결합니다. 그런 다음 스트립의 음극선을 드라이버의 음극 단자에 연결합니다. 모든 연결을 고정하고 전원을 켭니다. 이 간단한 배선 방법은 기본 설치에 적합합니다. 디밍이 필요하지 않습니다. 디밍이 불가능한 드라이버는 일정한 출력을 제공합니다. 따라서 LED 스트립이 최상의 빛을 발합니다. 여러 개의 스트립을 배선할 때는 총 와트가 드라이버의 용량을 초과하지 않도록 하는 것이 중요합니다. 모든 연결부를 안전하게 보호하는 것이 중요합니다. 제조업체의 지침을 따르세요. 이렇게 하면 전기 문제를 예방하고 안전하고 안정적인 설치를 보장할 수 있습니다.
디머블 LED 드라이버를 사용한 단색 LED 스트립 조명 배선s
디머블 LED 드라이버를 사용하면 밝기를 조절할 수 있습니다. 위에 설명된 대로 스트립을 드라이버에 연결합니다. 디머 유형에 맞는 특정 배선 다이어그램을 따르세요:
– 0-10V 디머블 LED 드라이버 연결 다이어그램
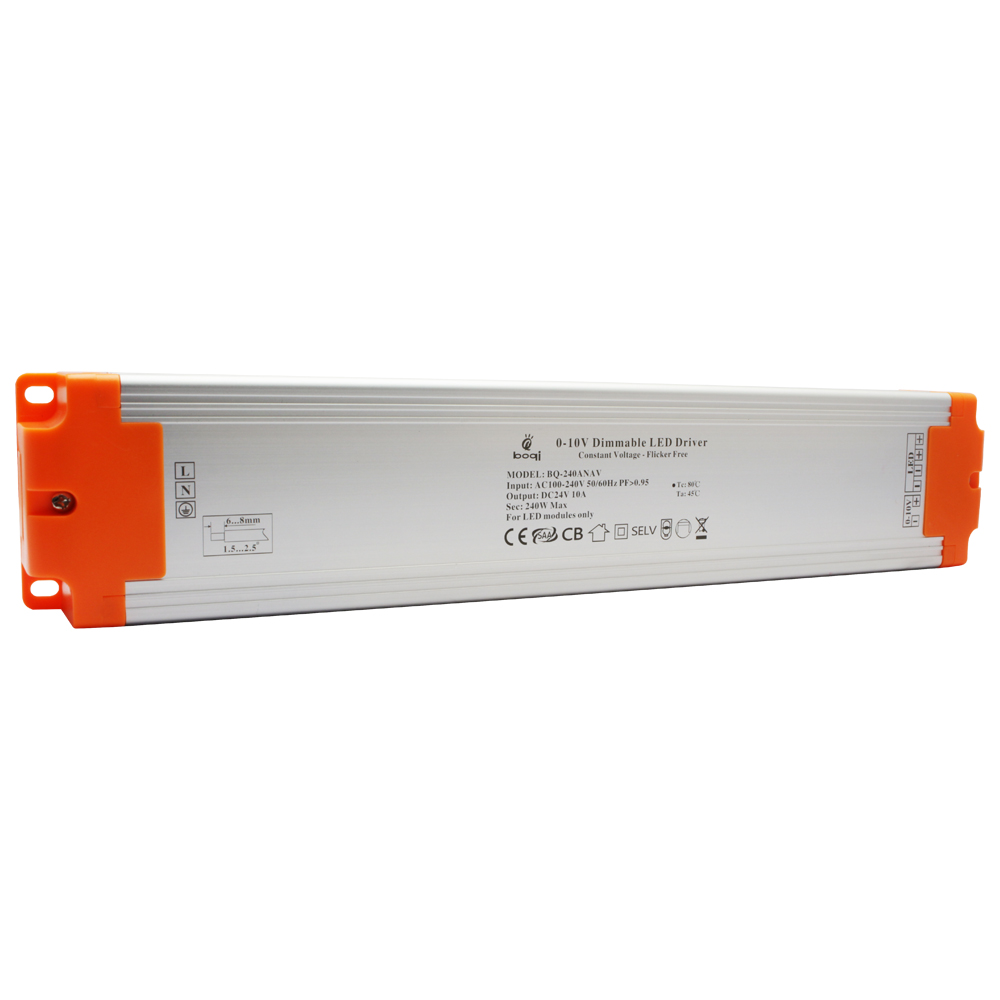
0-10V 디머블 드라이버는 저전압 제어 신호를 사용하여 밝기를 조정합니다. 0-10V 디머를 드라이버의 제어 단자에 연결하여 극성이 올바른지 확인합니다. 이 설정을 사용하면 전체 범위에서 부드럽게 디밍할 수 있습니다.

– Triac Dimmable LED Driver Connection Diagram
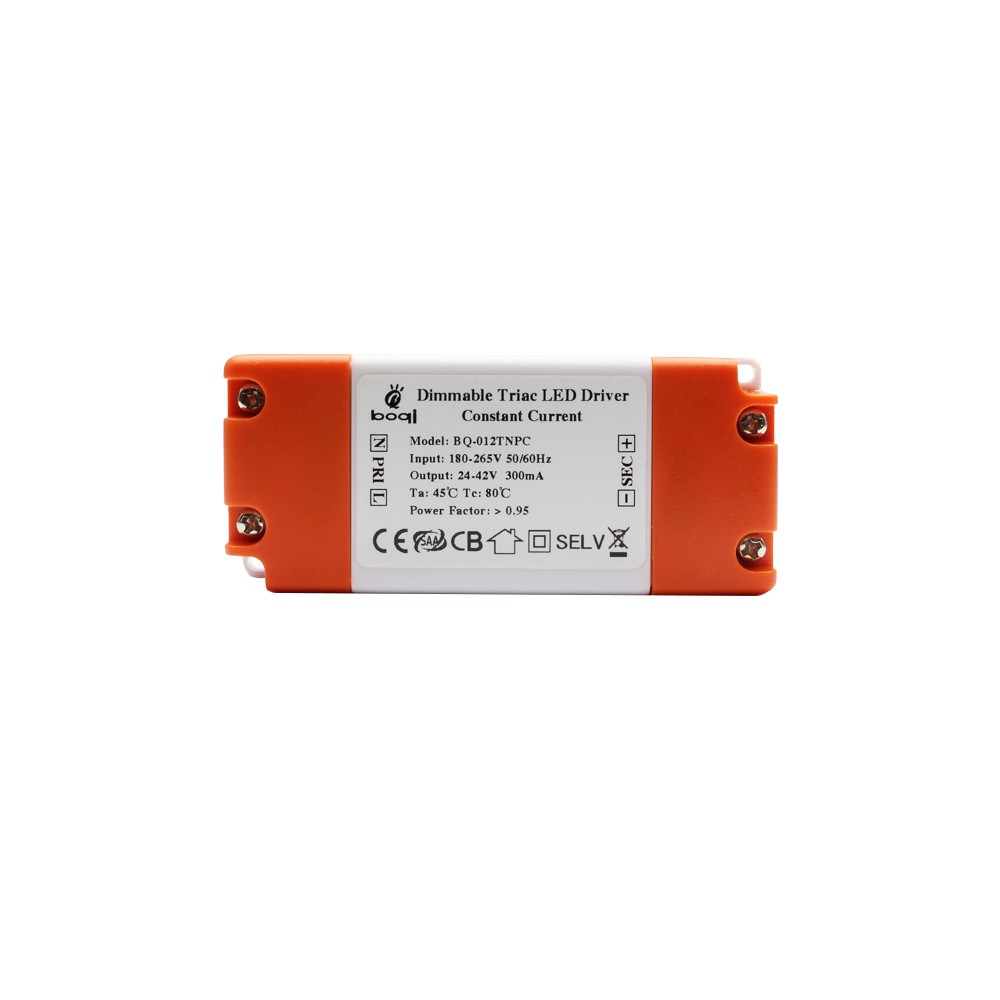
Triac dimmers work with AC phase-cut dimming. Connect the driver to a compatible triac dimmer switch, ensuring that the driver’s input matches the dimmer’s output. This method provides a familiar dimming experience similar to traditional incandescent bulbs.

– DALI Dimmable LED Driver Connection Diagram
DALI (Digital Addressable Lighting Interface) dimmers offer precise control and programmability. Connect the DALI control lines to the driver’s DALI input terminals. This setup is ideal for complex lighting systems requiring advanced control features.

LED 컨트롤러로 단일 컬러 LED 스트립 조명 배선하기
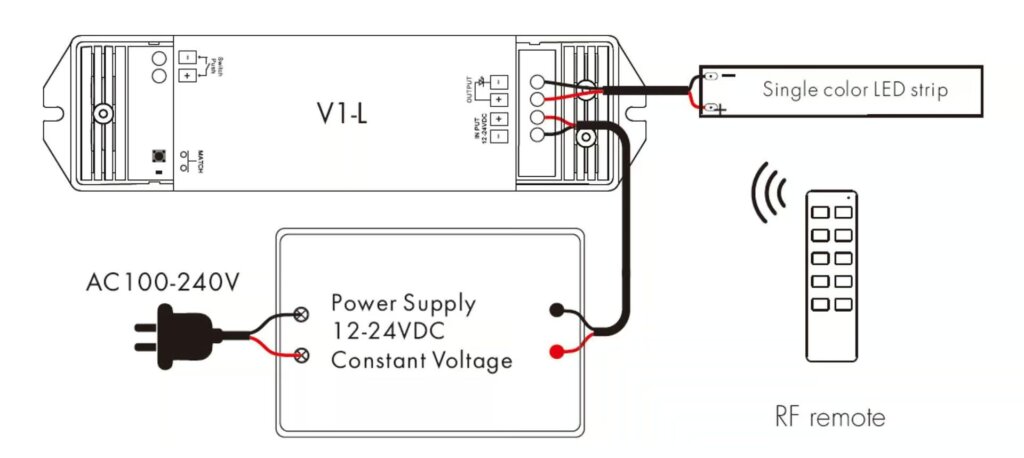
LED controllers provide more flexibility in controlling the lights. Connect the strip to the controller. Make sure the positive and negative wires match the controller’s terminals. Controllers allow for various effects, such as dimming, flashing, and custom lighting patterns. Ensure that the controller is compatible with your LED strip and power supply. Securing the connections properly is key. Following the manufacturer’s guidelines will ensure reliable operation and prevent potential issues.
Without PWM amplifier
With PWM amplifier
DMX512 디코더로 단일 컬러 LED 스트립 조명 배선하기
DMX512 decoders are used for advanced lighting setups. Connect the strip to the decoder, matching the positive and negative wires to the correct terminals. DMX512 is a digital communication protocol. It is used for lighting control and provides precise control over many channels. This setup is common in stage lighting. It is also used in architectural lighting and other pro applications. Ensure the DMX512 decoder is set up right. Connect it to the DMX controller for best performance.

조정 가능한 흰색 LED 스트립 조명 배선 방법
디머블 LED 드라이버를 사용한 배선 조정 가능한 흰색 LED 스트립 조명
Tunable white LED strips allow for color temperature adjustments. Connect the wires as per the driver’s instructions, ensuring proper connections for both color temperature and brightness control. Tunable white strips typically have additional control lines for adjusting the color temperature. These strips can transition from warm white to cool white, providing versatile lighting options. Ensure that your dimmable LED driver is compatible with tunable white strips and that all connections are secure for reliable operation.
DALI DT8 Tunable White LED Driver
DALI DT8 drivers are used for precise control of tunable white strips. Follow the wiring diagram provided by the manufacturer. DALI DT8 drivers support tunable white LED strips. They allow independent control of brightness and color temperature. This advanced control capability is ideal for applications requiring dynamic lighting environments. Properly wiring and configuring the DALI DT8 driver ensures smooth operation and optimal performance of your tunable white LED strips.

LED 컨트롤러로 조정 가능한 백색 LED 스트립 조명 배선하기
Connect the tunable white strip to the controller, matching the positive and negative terminals. Ensure secure connections for reliable operation. LED controllers for tunable white strips allow for precise adjustments in color temperature and brightness. These controllers often come with remote controls or can be integrated into smart home systems for added convenience. Proper installation and configuration of the controller ensure consistent and reliable operation.
Without PWM amplifier

DMX512 디코더를 사용한 배선 조정 가능한 흰색 LED 스트립 조명

Use a DMX512 decoder for tunable white strips in advanced setups. Connect the strip to the decoder, following the wiring diagram for proper installation. DMX512 decoders provide fine control over color temperature and brightness. They are ideal for professional lighting. Ensure that the decoder is correctly connected to the DMX controller and that all connections are secure for optimal performance.
2선 가변형 백색 LED 스트립 조명
Simpler tunable white strips use two wires for color temperature control. Connect these wires to the appropriate terminals on your controller or driver. This type of tunable white strip typically has a simpler wiring configuration, making it easier to install. However, it may offer fewer control options compared to more advanced tunable white systems. Ensure that your controller or driver is compatible with the two-wire configuration for reliable operation.

RGB LED 스트립 조명 배선 방법
디머블 LED 드라이버로 RGB LED 스트립 조명 배선하기
Connect the RGB strip to the dimmable driver, matching the red, green, and blue wires to the corresponding terminals. Use the wiring diagram provided. Dimmable drivers for RGB strips allow you to adjust the brightness of the entire strip. However, color control will require an additional RGB controller. Ensure that all connections are secure and that the driver is compatible with your RGB strip for reliable operation.
DALI DT8 RGB LED Driver
For advanced RGB control, use a DALI DT8 driver. Follow the manufacturer’s wiring diagram for precise installation. DALI DT8 drivers provide separate control over each color. This allows for complex lighting and precise color mixing. This advanced control is great for apps that need dynamic lighting. They need lighting that can be customized. Proper installation and setup of the DALI DT8 driver make sure your RGB LED strips work well. They will have the best performance.

LED 컨트롤러로 RGB LED 스트립 조명 배선하기
Connect the RGB strip to the controller, ensuring each color wire is connected to the appropriate
terminal. RGB controllers allow for various lighting effects, such as color changing, flashing, and custom patterns. Ensure that the controller is compatible with your RGB strip and power supply. Properly securing the connections and following the manufacturer’s guidelines will help ensure reliable operation and prevent potential issues.
Without PWM amplifier
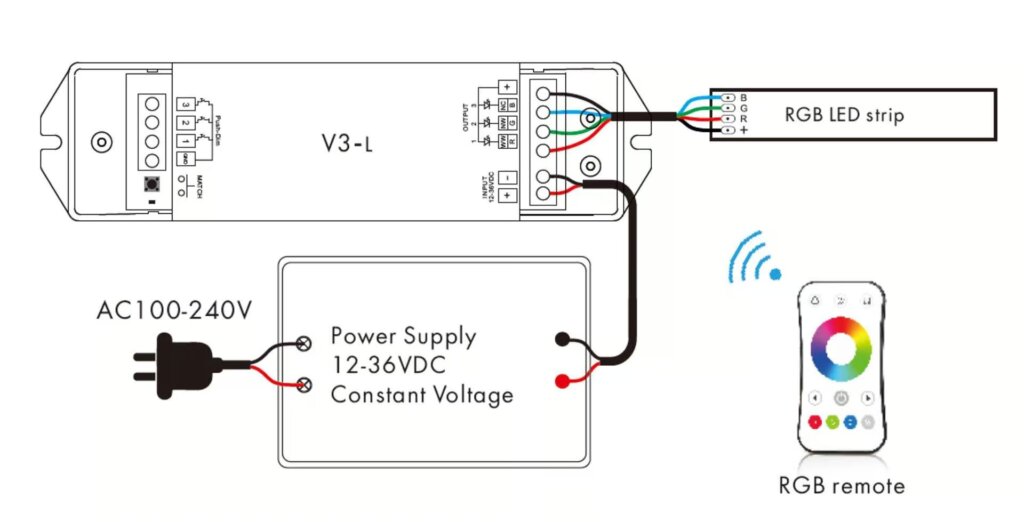
With PWM amplifier

DMX512 디코더로 RGB LED 스트립 조명 배선하기
Use a DMX512 decoder for RGB strips in complex setups. Follow the wiring diagram to ensure correct installation. DMX512 decoders provide precise control over each color channel, allowing for intricate lighting effects and precise color mixing. This setup is commonly used in professional lighting applications, such as stage lighting and architectural lighting. Make sure the DMX512 decoder is set up right. Connect it to the DMX controller for the best performance.

RGBW LED 스트립 조명 배선 방법
디머블 LED 드라이버로 RGBW LED 스트립 조명 배선하기
Connect the RGBW strip to the dimmable driver, ensuring all color wires (red, green, blue, white) are connected correctly. Dimmable drivers for RGBW strips allow you to adjust the brightness of the entire strip. However, color control will require an additional RGBW controller. Ensure that all connections are secure and that the driver is compatible with your RGBW strip for reliable operation.
DALI DT8 RGBW LED Driver
For advanced RGBW control, use a DALI DT8 driver. Follow the manufacturer’s wiring instructions. DALI DT8 drivers provide separate control over each color. This allows for complex lighting effects and precise color mixing. This advanced control is great for applications. They need dynamic and customizable lighting. The DT8 driver must be properly installed and configured. This ensures smooth and optimal performance of your RGBW LED strips.

LED 컨트롤러로 RGBW LED 스트립 조명 배선하기
Connect the RGBW strip to the controller, matching all color wires to the correct terminals. RGBW controllers allow for various lighting effects, such as color changing, flashing, and custom patterns. Ensure that the controller is compatible with your RGBW strip and power supply. Securing the connections properly and following the manufacturer’s guidelines will help. It will ensure reliable operation and prevent issues.
Without PWM amplifier
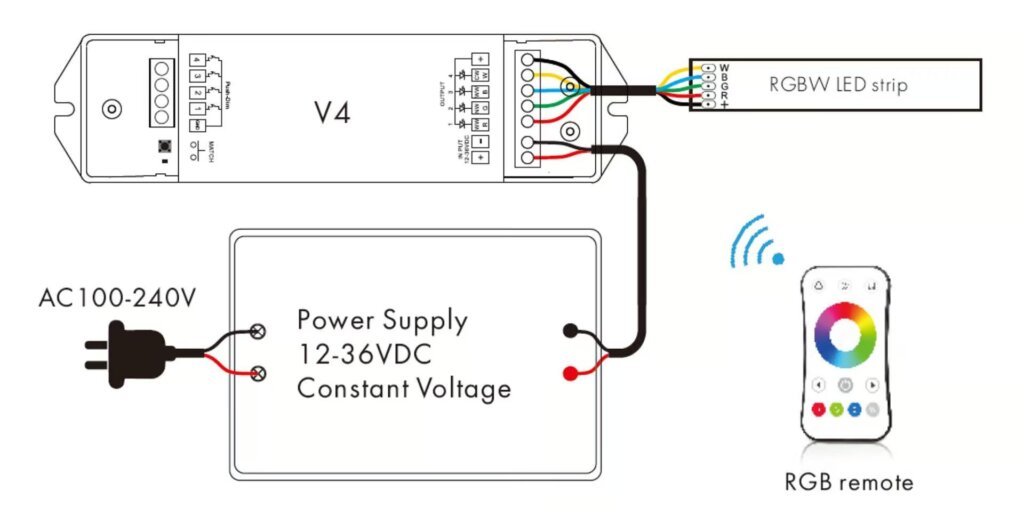
With PWM amplifier

DMX512 디코더로 RGBW LED 스트립 조명 배선하기
Use a DMX512 decoder for RGBW strips in advanced setups. Follow the wiring diagram for proper installation. DMX512 decoders give precise control over each color channel. They allow for complex lighting effects and exact color mixing. This setup is common in professional lighting. It is used for stage and architectural lighting. Make sure the DMX512 decoder is set up and connected to the DMX controller. This is needed for best performance.

RGB 및 CCT LED 스트립 조명 배선 방법
디머블 LED 드라이버로 RGBW LED 스트립 조명 배선하기
Follow the wiring diagram to connect the RGBW strip to a dimmable driver, ensuring all connections are secure. Dimmable drivers for RGBW strips allow you to adjust the brightness of the entire strip. However, color control will require an additional RGBW controller. Ensure that all connections are secure and that the driver is compatible with your RGBW strip for reliable operation.

LED 컨트롤러로 RGBW LED 스트립 조명 배선하기
Connect the strip to the controller, matching the wires to the appropriate terminals. RGBW controllers allow for various lighting effects, such as color changing, flashing, and custom patterns. Ensure that the controller is compatible with your RGBW strip and power supply. Properly securing the connections and following the manufacturer’s guidelines will help ensure reliable operation and prevent potential issues.
Without PWM amplifier

With PWM amplifier

DMX512 디코더로 RGBW LED 스트립 조명 배선하기
Use a DMX512 decoder for complex setups. Follow the wiring diagram to ensure proper installation. DMX512 decoders provide precise control over each color channel. They allow for complex lighting effects and exact color mixing. This setup is commonly used in professional lighting applications, such as stage lighting and architectural lighting. Ensure the DMX512 decoder is properly configured. Connect it to the DMX controller for best performance.

어드레서블 LED 스트립 조명 배선 방법
SPI 어드레서블 LED 스트립 조명 배선 방법
Connect the data and power wires of the SPI addressable strip to the controller, following the wiring diagram provided. Addressable LED strips allow for individual control of each LED, enabling complex lighting effects and patterns. Ensure that the controller is compatible with your SPI addressable strip and that all connections are secure. Properly configuring the controller and following the manufacturer’s instructions will help ensure reliable operation and prevent potential issues.
데이터 채널만 있는 SPI 주소 지정 가능 LED 스트립 조명
Ensure the data wire is connected securely to the controller. This setup allows for basic control of addressable LEDs. It lets you make custom lighting effects. Properly securing the data wire and following the wiring diagram will help ensure reliable operation and prevent potential issues.

데이터 및 클록 채널이 있는 SPI 주소 지정 가능 LED 스트립 조명
Connect both data and clock wires to the controller, ensuring secure connections. This setup allows for more precise control of the addressable LEDs, enabling complex lighting effects and patterns. Properly configuring the controller and following the manufacturer’s instructions will help ensure reliable operation and prevent potential issues.

데이터 및 백업 데이터 채널이 있는 SPI 주소 지정 가능 LED 스트립 조명
Follow the wiring diagram to connect data, clock, and backup data wires to the controller. This configuration provides redundancy, ensuring reliable operation even if one data channel fails. Securing all connections properly is key. Following the manufacturer’s instructions will help. It ensures reliable operation and prevents potential issues.

DMX512 어드레서블 LED 스트립 조명 배선 방법
Use a DMX512 decoder for addressable strips. Follow the wiring diagram for proper installation. DMX512 decoders provide precise control over each LED, enabling complex lighting effects and patterns. This setup is commonly used in professional lighting applications, such as stage lighting and architectural lighting. Ensure the DMX512 decoder is set up right. Connect it to the DMX controller. This is key for top performance.

자주 묻는 질문
- How are strip LEDs wired?
- For each segment, the LEDs are wired in series, which means the operating voltages are added up, giving the higher voltage needed. All segments are wired in parallel, so they receive the same voltage, but the current draw increases with the length of the strip. Understanding this wiring method helps maintain consistent brightness and prevents issues such as uneven lighting or flickering.
- What are the colors of the wires on LED light strips?
- RGB strip light has a 4-wire connection: green, red, blue for the LEDs, and black/white for the common +12V connection. Properly matching these wires to the corresponding terminals on the controller or power supply ensures correct operation and color mixing.
- What are 4 wires in LED strip light?
- For RGB strips, you need 4 wires: one neutral (yellow) and the rest control the 3 LED colors (Red, Green, Blue). Connecting these wires correctly ensures proper color control and operation of the strip.
- How many wires for an LED strip?
- The RGBW LED strip has five wires: red, green, blue, white, and positive. Connect the LED light strip to the corresponding mark on the RGBW LED light controller. Ensuring all connections are secure and following the wiring diagram provided by the manufacturer will help prevent potential issues and ensure reliable operation.
결론
Wiring LED strip lights don’t have to be intimidating. With this guide, you now have the knowledge to tackle various types of LED strip lights, ensuring a successful and safe installation. Happy lighting!
닫기
적절한 플리커 프리 디머블 LED 드라이버를 선택하는 것은 조명을 최적화하여 전반적인 웰빙과 편안함을 향상시키는 데 매우 중요합니다. 플리커가 없다는 것은 생활 공간에서 느끼는 편안함의 수준에 매우 중요합니다.
이 문서에서는 이상적인 플리커 프리 디밍 LED 드라이버를 선택하는 데 도움이 되는 다음과 같은 측면을 살펴봅니다:
조명의 깜박임을 방지하기 위한 사양, 호환성 및 효율성과 같은 필수 기능을 살펴봅니다. 또한 디머블 LED 드라이버 시리즈에서 플리커 없는 결과를 얻기 위한 높은 PWM 주파수의 중요성에 대해서도 설명합니다.
구매 디밍이 가능한 LED 드라이버 boqi에서
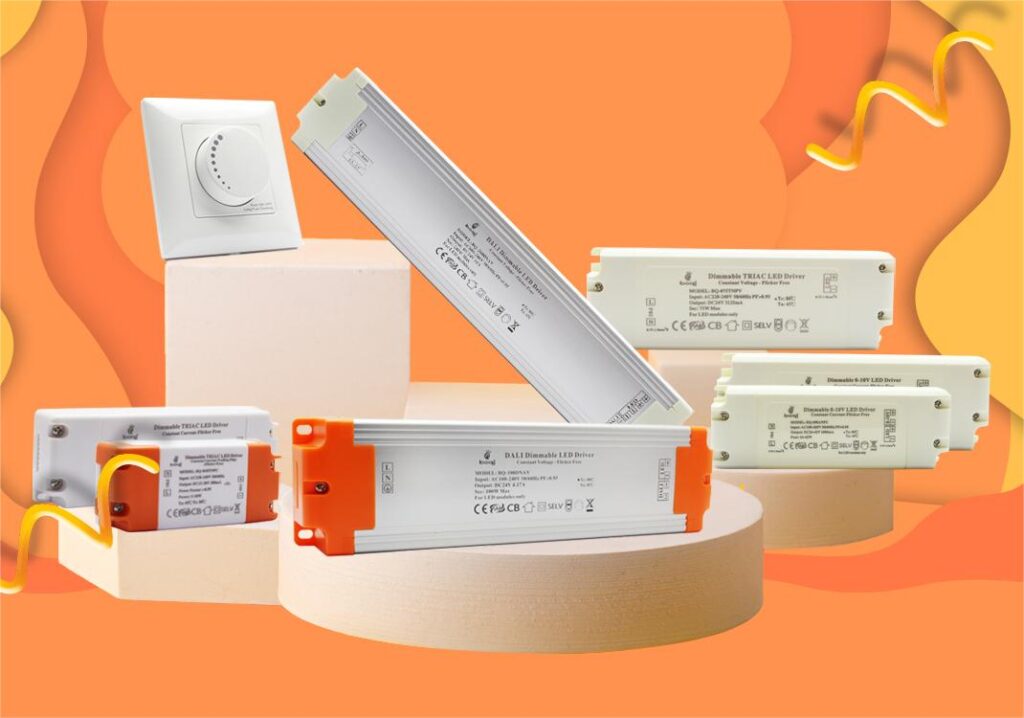
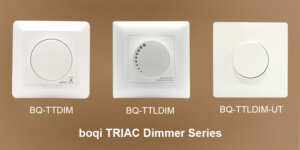
조명 플리커의 일반적인 원인에 대한 정보를 얻는 것은 필수적이지만 적합한 디머블 LED 드라이버를 선택하는 작업은 여전히 진행 중입니다. 원하는 조명 및 디밍 효과를 실현하려면 평판이 좋은 LED 드라이버 제조업체와 연결하는 것이 필수적입니다. boqi는 다양한 플리커 프리, 디머 및 컨트롤러를 제공하는 유명한 디머블 LED 드라이버 제조업체로 두각을 나타내고 있습니다. 제품 범위에는 TRIAC, 0-10V 및 DALI LED 드라이버, 디머 및 컨트롤러가 포함됩니다.
중국에 제조 기지를 두고 운영되는 이 회사는 고객의 다양한 요구와 사양에 맞춰 제품을 생산합니다. LED 드라이버 또는 컨트롤러에 관한 문의 사항이 있으시면 언제든지 문의해 주시면 선택의 폭을 넓힐 수 있도록 도와드리겠습니다.

