Подключение светодиодных лент может показаться сложной задачей. Но при правильном руководстве это простой процесс. Он может великолепно украсить ваше помещение. Это для энтузиастов DIY, домовладельцев, желающих добавить атмосферу, и электриков, приступающих к новому проекту. Это руководство упростит для вас процесс подключения.
Чтобы подключить светодиодную ленту, начните с определения типа ленты (одноцветная, RGB или RGBW). Подключите положительный и отрицательный провода к соответствующим клеммам на блоке питания или контроллере. Для лент RGB подберите цвета (красный, зеленый, синий) к соответствующим клеммам. Убедитесь в надежности всех соединений и следуйте прилагаемой схеме подключения для получения точных инструкций.
Давайте погрузимся в детали подключения различных типов светодиодных лент. Это позволит вам получить знания и уверенность, чтобы сделать все правильно.
- Понимание параллельного соединения: Упрощенный
- Падение напряжения: простое объяснение
- ШИМ-усилитель: Превращение сложного в простое
- Типы светодиодных лент
- Как подключить одноцветную светодиодную ленту
- Подключение одноцветных светодиодных лент с недиммируемыми светодиодными драйверами
- Проводка одноцветных светодиодных лент с диммируемыми светодиодными драйверами
- Проводка одноцветных светодиодных лент с контроллерами LED
- Проводка одноцветных светодиодных лент с декодером DMX512
- Как подключить настраиваемую белую светодиодную ленту
- Проводка настраиваемых белых светодиодных лент с диммируемыми светодиодными драйверами
- Проводка настраиваемых белых светодиодных лент с LED-контроллерами
- Проводка Настраиваемые белые светодиодные ленты с декодером DMX512
- Два провода настраиваемый белый светодиодные ленты огни
- Как подключить светодиодную ленту RGB
- Проводка RGB светодиодной ленты с диммируемыми светодиодными драйверами
- Подключение светодиодных лент RGB с контроллерами
- Проводка RGB светодиодных лент с декодером DMX512
- Как подключить светодиодную ленту RGBW
- Проводка RGBW светодиодных лент с диммируемыми светодиодными драйверами
- Подключение светодиодных лент RGBW с контроллерами
- Проводка RGBW светодиодных лент с декодером DMX512
- Как подключить светодиодную ленту RGB и CCT
- Проводка RGBW светодиодных лент с диммируемыми светодиодными драйверами
- Подключение светодиодных лент RGBW с контроллерами
- Проводка RGBW светодиодных лент с декодером DMX512
- Как подключить адресные светодиодные ленты
- Как подключить светодиодную ленту с SPI-адресом
- Светодиодные ленты с SPI-адресацией и только каналом данных
- Светодиодные ленты с SPI-адресацией и каналами данных и синхронизации
- Светодиодные ленты с SPI-адресацией и каналами данных и резервных данных
- Как подключить адресные светодиодные ленты DMX512
- Вопросы и ответы
- Заключение
- Закрытие
Понимание параллельного соединения: Упрощенный
Параллельные соединения имеют решающее значение для освещения светодиодной лентой. Каждый сегмент ленты подключен последовательно, то есть рабочие напряжения суммируются, обеспечивая необходимое более высокое напряжение. При параллельном подключении все сегменты получают одинаковое напряжение, но потребляемый ток увеличивается с ростом длины ленты. Используйте параллельные соединения. Они гарантируют, что каждый сегмент ленты получает стабильное напряжение. Это предотвращает такие проблемы, как неравномерная яркость или мерцание. Такая настройка является ключевой для длинных светодиодных лент. Она позволяет поддерживать стабильный и ровный свет. Понимание основ параллельного подключения может значительно повысить эффективность и надежность вашей установки светодиодного освещения.


Падение напряжения: простое объяснение
Падение напряжения возникает, когда напряжение в конце ленты ниже, чем в начале. Это может привести к тому, что светодиоды в конце ленты будут светить тусклее. Чтобы уменьшить падение напряжения, используйте более толстые провода, более короткие ленты или подавайте питание в нескольких точках вдоль ленты. Важно тщательно спланировать установку, чтобы минимизировать падение напряжения, особенно в длинных линиях. Один из хороших способов - использовать усилители мощности или бустеры. Используйте их через регулярные промежутки времени. Они помогут поддерживать стабильное напряжение на всей полосе. Кроме того, выбор лучшего блока питания с достаточной мощностью также может снизить риск падения напряжения. Поняв и устранив падение напряжения, вы сможете обеспечить хорошую работу светодиодной ленты. Они обеспечат равномерное освещение по всей установке.
ШИМ-усилитель: Превращение сложного в простое
Усилитель с широтно-импульсной модуляцией (ШИМ) усиливает сигнал на светодиодных лентах, обеспечивая постоянную яркость на длинных лентах. Он гарантирует, что сигнал питания остается сильным, предотвращая затемнение или мерцание. ШИМ-усилители полезны в больших инсталляциях. Они поддерживают равномерный световой поток, что очень важно. Эти усилители регенерируют ШИМ-сигнал. Они расширяют эффективный диапазон светодиодных лент. Это гарантирует, что каждая секция получит правильное напряжение и ток. Установка ШИМ-усилителей проста. Вы можете добавить их в свою установку. При правильном размещении и настройке ШИМ-усилители могут значительно улучшить освещение светодиодной лентой. Они повышают производительность и долговечность.
Типы светодиодных лент
Светодиодные ленты бывают разных типов, включая одноцветные, RGB (красный, зеленый, синий), RGBW (красный, зеленый, синий, белый) и настраиваемые белые. Для каждого типа требуется своя проводка и контроллеры. Одноцветные полосы - самые простые, с двумя проводами для положительного и отрицательного подключения. RGB-полоски добавляют три цветовых канала, требуя контроллера для смешивания цветов. RGBW-полоски включают дополнительный белый канал для более тонкого освещения. Настраиваемые белые ленты позволяют регулировать цветовую температуру, обеспечивая диапазон белого света от теплого до холодного. Знание различий между этими типами светодиодных лент поможет вам выбрать подходящий продукт для ваших нужд. Это также обеспечит правильную настройку и использование.
Как подключить одноцветную светодиодную ленту
Подключение одноцветных светодиодных лент с недиммируемыми светодиодными драйверами
Для недиммируемых светодиодных драйверов подключите положительный провод ленты к положительной клемме драйвера. Затем подключите отрицательный провод ленты к отрицательной клемме драйвера. Закрепите все соединения и включите питание. Этот простой способ подключения отлично подходит для базовых инсталляций. Они не требуют диммирования. Недиммируемые драйверы обеспечивают постоянную мощность. Это гарантирует, что ваши светодиодные ленты будут светить как можно лучше. При подключении нескольких лент важно убедиться, что общая мощность не превышает возможности драйвера. Надежность всех соединений - ключевой момент. Следуйте инструкциям производителя. Это позволит избежать проблем с электричеством и обеспечит безопасную и надежную установку.
Проводка Одноцветные светодиодные ленты с диммируемым светодиодным драйверомs
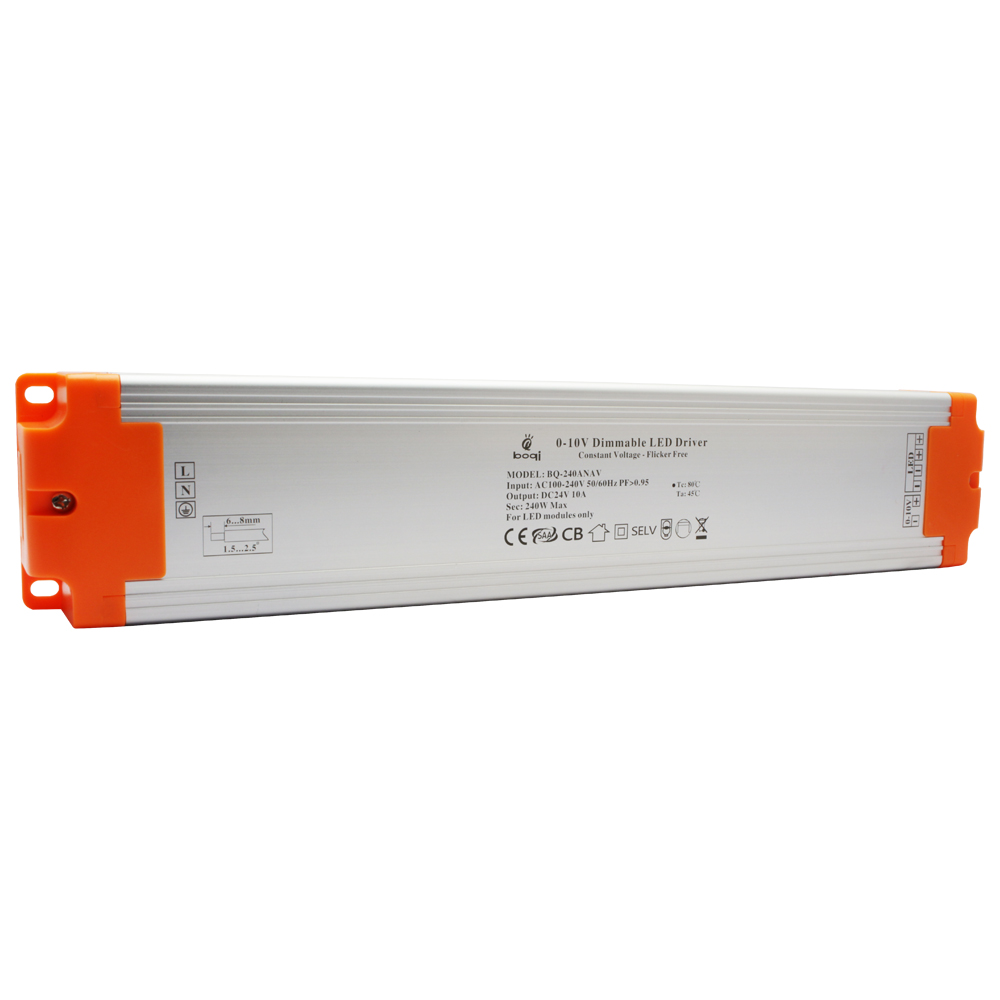
Диммируемые светодиодные драйверы позволяют регулировать яркость. Подключите ленту к драйверу, как описано выше. Следуйте специальной схеме подключения для вашего типа диммера:
– Схема подключения диммируемого светодиодного драйвера 0-10 В
Диммируемый драйвер 0-10 В использует низковольтный управляющий сигнал для регулировки яркости. Подключите диммер 0-10 В к клеммам управления драйвера, соблюдая правильную полярность. Такая установка обеспечивает плавную регулировку яркости во всем диапазоне.

– Triac Dimmable LED Driver Connection Diagram
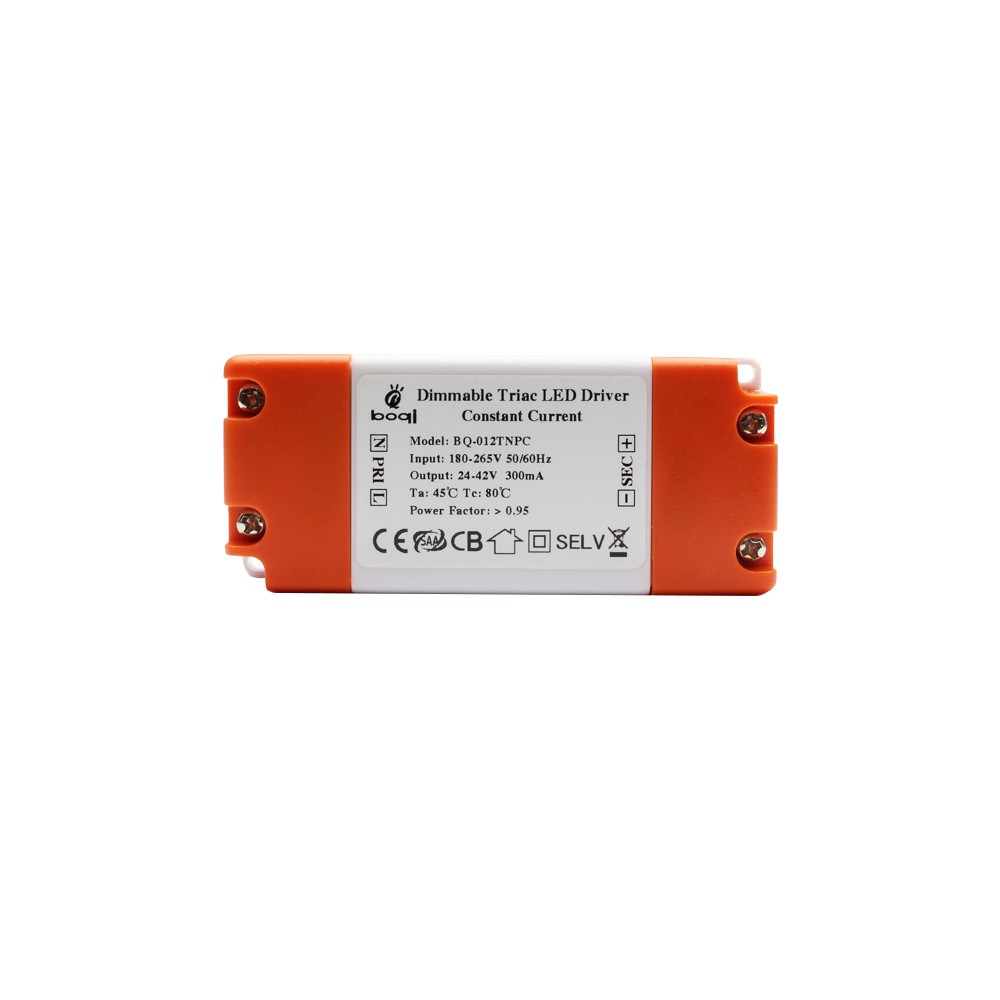
Triac dimmers work with AC phase-cut dimming. Connect the driver to a compatible triac dimmer switch, ensuring that the driver’s input matches the dimmer’s output. This method provides a familiar dimming experience similar to traditional incandescent bulbs.

– DALI Dimmable LED Driver Connection Diagram
DALI (Digital Addressable Lighting Interface) dimmers offer precise control and programmability. Connect the DALI control lines to the driver’s DALI input terminals. This setup is ideal for complex lighting systems requiring advanced control features.

Проводка одноцветных светодиодных лент с контроллерами LED
LED controllers provide more flexibility in controlling the lights. Connect the strip to the controller. Make sure the positive and negative wires match the controller’s terminals. Controllers allow for various effects, such as dimming, flashing, and custom lighting patterns. Ensure that the controller is compatible with your LED strip and power supply. Securing the connections properly is key. Following the manufacturer’s guidelines will ensure reliable operation and prevent potential issues.
Without PWM amplifier
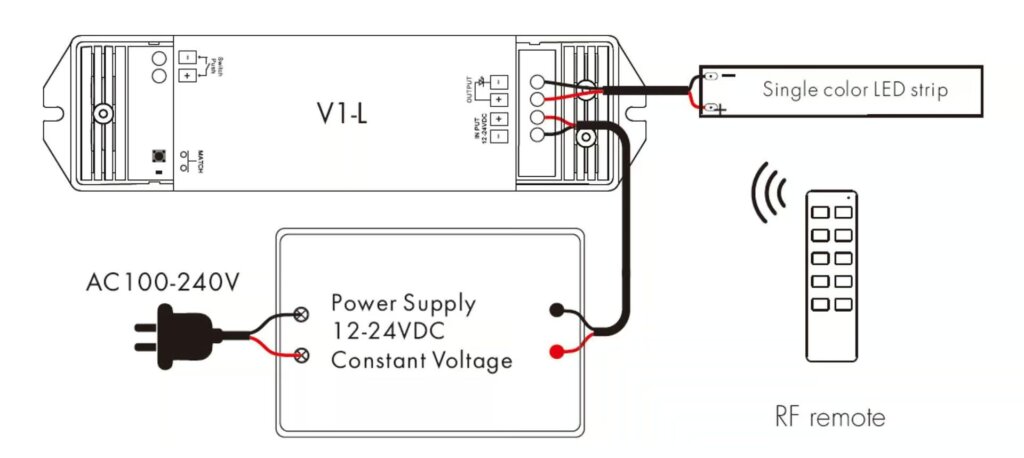
With PWM amplifier
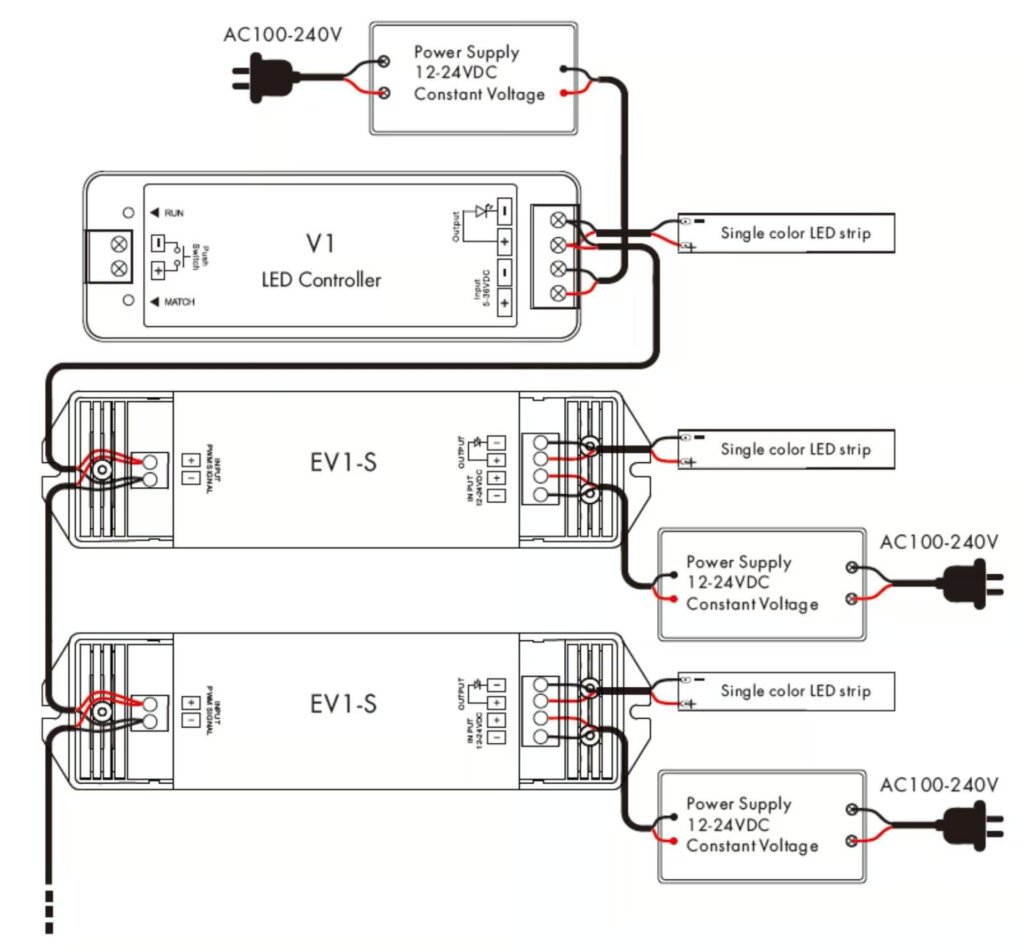
Проводка одноцветных светодиодных лент с декодером DMX512
DMX512 decoders are used for advanced lighting setups. Connect the strip to the decoder, matching the positive and negative wires to the correct terminals. DMX512 is a digital communication protocol. It is used for lighting control and provides precise control over many channels. This setup is common in stage lighting. It is also used in architectural lighting and other pro applications. Ensure the DMX512 decoder is set up right. Connect it to the DMX controller for best performance.

Как подключить настраиваемую белую светодиодную ленту
Проводка настраиваемых белых светодиодных лент с диммируемыми светодиодными драйверами
Tunable white LED strips allow for color temperature adjustments. Connect the wires as per the driver’s instructions, ensuring proper connections for both color temperature and brightness control. Tunable white strips typically have additional control lines for adjusting the color temperature. These strips can transition from warm white to cool white, providing versatile lighting options. Ensure that your dimmable LED driver is compatible with tunable white strips and that all connections are secure for reliable operation.
DALI DT8 Tunable White LED Driver
DALI DT8 drivers are used for precise control of tunable white strips. Follow the wiring diagram provided by the manufacturer. DALI DT8 drivers support tunable white LED strips. They allow independent control of brightness and color temperature. This advanced control capability is ideal for applications requiring dynamic lighting environments. Properly wiring and configuring the DALI DT8 driver ensures smooth operation and optimal performance of your tunable white LED strips.

Проводка настраиваемых белых светодиодных лент с LED-контроллерами
Connect the tunable white strip to the controller, matching the positive and negative terminals. Ensure secure connections for reliable operation. LED controllers for tunable white strips allow for precise adjustments in color temperature and brightness. These controllers often come with remote controls or can be integrated into smart home systems for added convenience. Proper installation and configuration of the controller ensure consistent and reliable operation.
Without PWM amplifier

Проводка Настраиваемые белые светодиодные ленты с декодером DMX512

Use a DMX512 decoder for tunable white strips in advanced setups. Connect the strip to the decoder, following the wiring diagram for proper installation. DMX512 decoders provide fine control over color temperature and brightness. They are ideal for professional lighting. Ensure that the decoder is correctly connected to the DMX controller and that all connections are secure for optimal performance.
Два провода настраиваемый белый светодиодные ленты огни
Simpler tunable white strips use two wires for color temperature control. Connect these wires to the appropriate terminals on your controller or driver. This type of tunable white strip typically has a simpler wiring configuration, making it easier to install. However, it may offer fewer control options compared to more advanced tunable white systems. Ensure that your controller or driver is compatible with the two-wire configuration for reliable operation.

Как подключить светодиодную ленту RGB
Проводка RGB светодиодной ленты с диммируемыми светодиодными драйверами
Connect the RGB strip to the dimmable driver, matching the red, green, and blue wires to the corresponding terminals. Use the wiring diagram provided. Dimmable drivers for RGB strips allow you to adjust the brightness of the entire strip. However, color control will require an additional RGB controller. Ensure that all connections are secure and that the driver is compatible with your RGB strip for reliable operation.
DALI DT8 RGB LED Driver
For advanced RGB control, use a DALI DT8 driver. Follow the manufacturer’s wiring diagram for precise installation. DALI DT8 drivers provide separate control over each color. This allows for complex lighting and precise color mixing. This advanced control is great for apps that need dynamic lighting. They need lighting that can be customized. Proper installation and setup of the DALI DT8 driver make sure your RGB LED strips work well. They will have the best performance.

Подключение светодиодных лент RGB с контроллерами
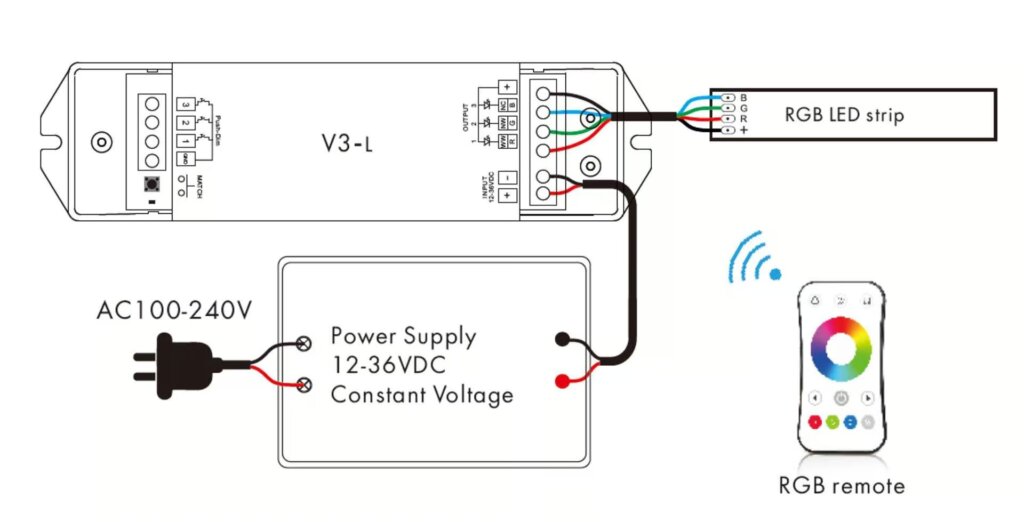
Connect the RGB strip to the controller, ensuring each color wire is connected to the appropriate
terminal. RGB controllers allow for various lighting effects, such as color changing, flashing, and custom patterns. Ensure that the controller is compatible with your RGB strip and power supply. Properly securing the connections and following the manufacturer’s guidelines will help ensure reliable operation and prevent potential issues.
Without PWM amplifier
With PWM amplifier

Проводка RGB светодиодных лент с декодером DMX512
Use a DMX512 decoder for RGB strips in complex setups. Follow the wiring diagram to ensure correct installation. DMX512 decoders provide precise control over each color channel, allowing for intricate lighting effects and precise color mixing. This setup is commonly used in professional lighting applications, such as stage lighting and architectural lighting. Make sure the DMX512 decoder is set up right. Connect it to the DMX controller for the best performance.

Как подключить светодиодную ленту RGBW
Проводка RGBW светодиодных лент с диммируемыми светодиодными драйверами
Connect the RGBW strip to the dimmable driver, ensuring all color wires (red, green, blue, white) are connected correctly. Dimmable drivers for RGBW strips allow you to adjust the brightness of the entire strip. However, color control will require an additional RGBW controller. Ensure that all connections are secure and that the driver is compatible with your RGBW strip for reliable operation.
DALI DT8 RGBW LED Driver
For advanced RGBW control, use a DALI DT8 driver. Follow the manufacturer’s wiring instructions. DALI DT8 drivers provide separate control over each color. This allows for complex lighting effects and precise color mixing. This advanced control is great for applications. They need dynamic and customizable lighting. The DT8 driver must be properly installed and configured. This ensures smooth and optimal performance of your RGBW LED strips.

Подключение светодиодных лент RGBW с контроллерами
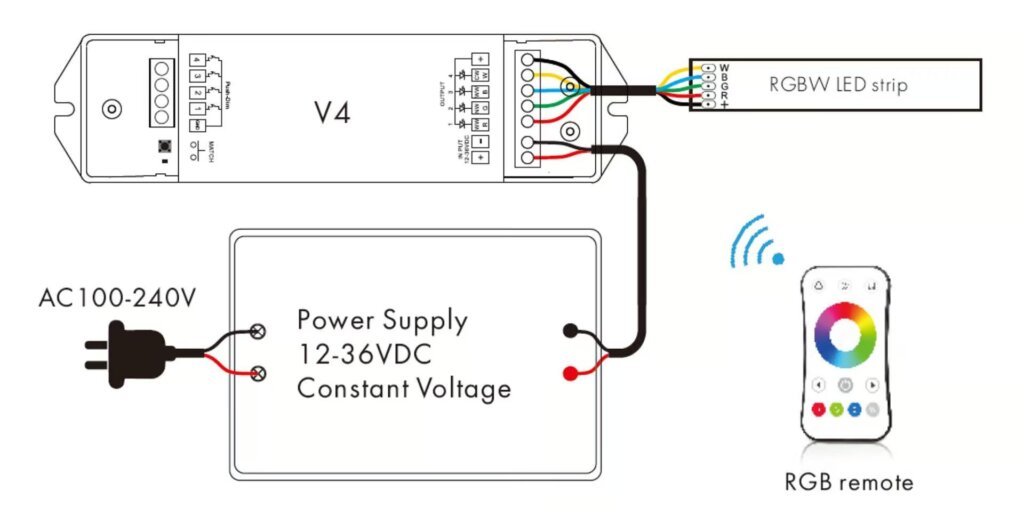
Connect the RGBW strip to the controller, matching all color wires to the correct terminals. RGBW controllers allow for various lighting effects, such as color changing, flashing, and custom patterns. Ensure that the controller is compatible with your RGBW strip and power supply. Securing the connections properly and following the manufacturer’s guidelines will help. It will ensure reliable operation and prevent issues.
Without PWM amplifier
With PWM amplifier

Проводка RGBW светодиодных лент с декодером DMX512
Use a DMX512 decoder for RGBW strips in advanced setups. Follow the wiring diagram for proper installation. DMX512 decoders give precise control over each color channel. They allow for complex lighting effects and exact color mixing. This setup is common in professional lighting. It is used for stage and architectural lighting. Make sure the DMX512 decoder is set up and connected to the DMX controller. This is needed for best performance.

Как подключить светодиодную ленту RGB и CCT
Проводка RGBW светодиодных лент с диммируемыми светодиодными драйверами
Follow the wiring diagram to connect the RGBW strip to a dimmable driver, ensuring all connections are secure. Dimmable drivers for RGBW strips allow you to adjust the brightness of the entire strip. However, color control will require an additional RGBW controller. Ensure that all connections are secure and that the driver is compatible with your RGBW strip for reliable operation.

Подключение светодиодных лент RGBW с контроллерами
Connect the strip to the controller, matching the wires to the appropriate terminals. RGBW controllers allow for various lighting effects, such as color changing, flashing, and custom patterns. Ensure that the controller is compatible with your RGBW strip and power supply. Properly securing the connections and following the manufacturer’s guidelines will help ensure reliable operation and prevent potential issues.
Without PWM amplifier

With PWM amplifier

Проводка RGBW светодиодных лент с декодером DMX512
Use a DMX512 decoder for complex setups. Follow the wiring diagram to ensure proper installation. DMX512 decoders provide precise control over each color channel. They allow for complex lighting effects and exact color mixing. This setup is commonly used in professional lighting applications, such as stage lighting and architectural lighting. Ensure the DMX512 decoder is properly configured. Connect it to the DMX controller for best performance.

Как подключить адресные светодиодные ленты
Как подключить светодиодную ленту с SPI-адресом
Connect the data and power wires of the SPI addressable strip to the controller, following the wiring diagram provided. Addressable LED strips allow for individual control of each LED, enabling complex lighting effects and patterns. Ensure that the controller is compatible with your SPI addressable strip and that all connections are secure. Properly configuring the controller and following the manufacturer’s instructions will help ensure reliable operation and prevent potential issues.
Светодиодные ленты с SPI-адресацией и только каналом данных
Ensure the data wire is connected securely to the controller. This setup allows for basic control of addressable LEDs. It lets you make custom lighting effects. Properly securing the data wire and following the wiring diagram will help ensure reliable operation and prevent potential issues.

Светодиодные ленты с SPI-адресацией и каналами данных и синхронизации
Connect both data and clock wires to the controller, ensuring secure connections. This setup allows for more precise control of the addressable LEDs, enabling complex lighting effects and patterns. Properly configuring the controller and following the manufacturer’s instructions will help ensure reliable operation and prevent potential issues.

Светодиодные ленты с SPI-адресацией и каналами данных и резервных данных
Follow the wiring diagram to connect data, clock, and backup data wires to the controller. This configuration provides redundancy, ensuring reliable operation even if one data channel fails. Securing all connections properly is key. Following the manufacturer’s instructions will help. It ensures reliable operation and prevents potential issues.

Как подключить адресные светодиодные ленты DMX512
Use a DMX512 decoder for addressable strips. Follow the wiring diagram for proper installation. DMX512 decoders provide precise control over each LED, enabling complex lighting effects and patterns. This setup is commonly used in professional lighting applications, such as stage lighting and architectural lighting. Ensure the DMX512 decoder is set up right. Connect it to the DMX controller. This is key for top performance.

Вопросы и ответы
- How are strip LEDs wired?
- For each segment, the LEDs are wired in series, which means the operating voltages are added up, giving the higher voltage needed. All segments are wired in parallel, so they receive the same voltage, but the current draw increases with the length of the strip. Understanding this wiring method helps maintain consistent brightness and prevents issues such as uneven lighting or flickering.
- What are the colors of the wires on LED light strips?
- RGB strip light has a 4-wire connection: green, red, blue for the LEDs, and black/white for the common +12V connection. Properly matching these wires to the corresponding terminals on the controller or power supply ensures correct operation and color mixing.
- What are 4 wires in LED strip light?
- For RGB strips, you need 4 wires: one neutral (yellow) and the rest control the 3 LED colors (Red, Green, Blue). Connecting these wires correctly ensures proper color control and operation of the strip.
- How many wires for an LED strip?
- The RGBW LED strip has five wires: red, green, blue, white, and positive. Connect the LED light strip to the corresponding mark on the RGBW LED light controller. Ensuring all connections are secure and following the wiring diagram provided by the manufacturer will help prevent potential issues and ensure reliable operation.
Заключение
Wiring LED strip lights don’t have to be intimidating. With this guide, you now have the knowledge to tackle various types of LED strip lights, ensuring a successful and safe installation. Happy lighting!
Закрытие
Выбор подходящих диммируемых светодиодных драйверов с функцией Flicker-Free имеет решающее значение для оптимизации освещения, повышая тем самым общее самочувствие и комфорт. Отсутствие мерцания имеет решающее значение для уровня комфорта, ощущаемого в жилых помещениях.
В этой статье мы рассмотрим следующие аспекты, которые помогут вам выбрать идеальные светодиодные драйверы с немерцающей яркостью:
Мы рассмотрим такие важные характеристики, как спецификации, совместимость и эффективность, позволяющие избежать мерцания в освещении. Кроме того, мы обсудим важность высокой частоты ШИМ для достижения результатов без мерцания в серии диммируемых светодиодных драйверов.
Купить Диммируемые светодиодные драйверы из Боки
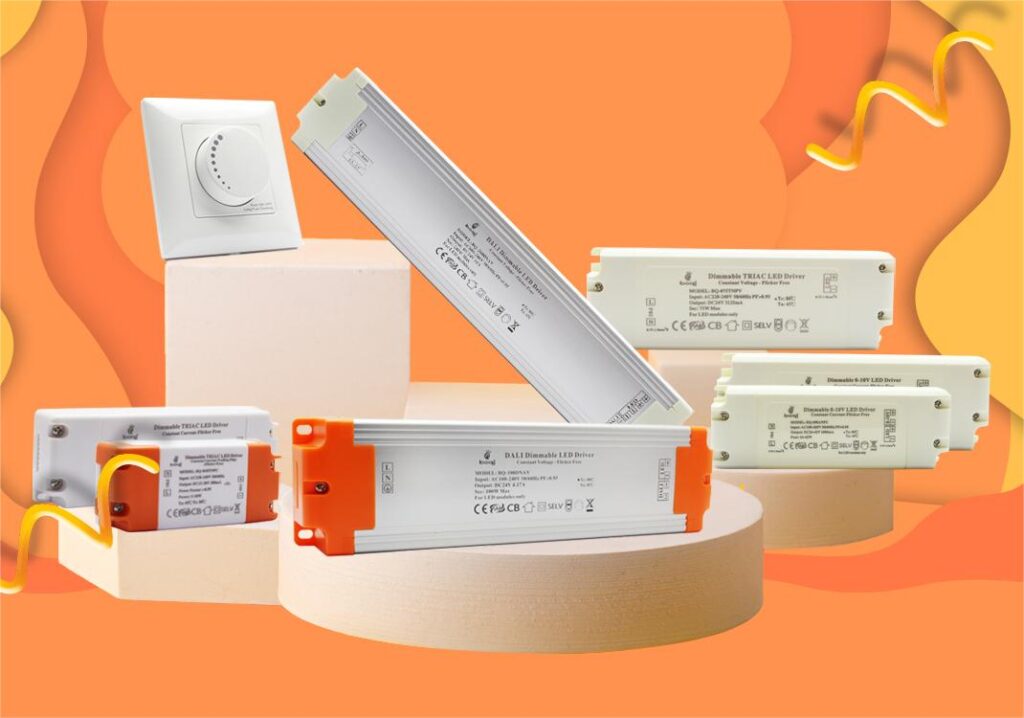
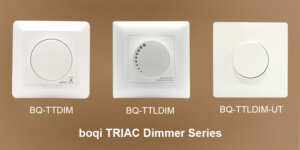
Информированность о распространенных причинах мерцания света очень важна, но задача выбора подходящего диммируемого светодиодного драйвера все еще остается. Для достижения желаемых эффектов освещения и диммирования необходимо обратиться к авторитетному производителю светодиодных драйверов. Компания boqi является известным производителем диммируемых светодиодных драйверов, предлагая широкий ассортимент устройств для защиты от мерцания, диммеров и контроллеров. Ассортимент продукции включает в себя светодиодные драйверы, диммеры и контроллеры TRIAC, 0-10 В и DALI.
Имея производственные базы в Китае, компания учитывает специфические потребности и спецификации своих клиентов. Для получения запросов о потребностях в светодиодных драйверах или контроллерах обращайтесь к нам, и мы поможем вам определиться с выбором.

