Wiring LED strip lights can seem daunting. But, with the right guidance, it’s a simple process. It can enhance your space beautifully. It’s for DIY enthusiasts, homeowners looking to add ambiance, and electricians on a new project. This guide will simplify the wiring for you.
To wire LED strip lights, start by identifying the type of strip (single color, RGB, or RGBW). Connect the positive and negative wires to the corresponding terminals on your power supply or controller. For RGB strips, match the colors (red, green, blue) to the appropriate terminals. Ensure all connections are secure and follow the wiring diagram included for precise instructions.
Let’s dive into the details of wiring various types of LED strip lights. This will ensure you have the knowledge and confidence to do it right.
Understanding Parallel Connection: Simplified
Parallel connections are crucial in LED strip lighting. Each segment of the strip is wired in series, meaning the operating voltages are added up, providing the necessary higher voltage. All segments are wired in parallel, receiving the same voltage, but the current draw increases with the length of the strip. Use parallel connections. They ensure that each strip segment gets a steady voltage. This stops issues like uneven brightness or flickering. This setup is key for long LED strip runs. It keeps the light stable and even. Understanding parallel wiring basics can greatly improve the effectiveness and reliability of your LED lighting installation.


Voltage Drop: A Simple Explanation
Voltage drop occurs when the voltage at the end of the strip is lower than at the beginning. This can cause the LEDs at the end to be dimmer. To mitigate voltage drop, use thicker wires, or shorter strips, or inject power at multiple points along the strip. It’s essential to plan your installation carefully to minimize voltage drop, especially in longer runs. One good method is to use power boosters or amplifiers. Use them at regular intervals. They help maintain a steady voltage across the strip. Also, picking a better power supply with enough capacity can also cut the risk of voltage drop. By understanding and fixing voltage drop, you can ensure that your LED strip lights work well. They will provide even light across the whole installation.
PWM Amplifier: Turning Complex to Simple
A Pulse Width Modulation (PWM) amplifier boosts the signal to LED strips, allowing for consistent brightness across long strips. It ensures that the power signal remains strong, preventing dimming or flickering. PWM amplifiers are useful in large installations. They keep light output uniform, which is critical. These amplifiers regenerate the PWM signal. They extend the effective range of your LED strips. This ensures that every section gets the right voltage and current. Installing PWM amplifiers is simple. You can add them to your setup. Placing and setting them up right, PWM amplifiers can greatly improve LED strip lighting. They can boost performance and longevity.
Types of LED Strip Lights
LED strip lights come in various types, including single color, RGB (Red, Green, Blue), RGBW (Red, Green, Blue, White), and tunable white. Each type requires different wiring and controllers. Single color strips are the simplest, with just two wires for positive and negative connections. RGB strips add three color channels, requiring a controller to mix colors. RGBW strips include an additional white channel for more nuanced lighting options. Tunable white strips allow for adjustments in color temperature, offering a range of white light from warm to cool. Knowing the differences between these LED strip types can help you pick the right product for your needs. It will also ensure proper setup and use.
How to Wire Single Color LED Strip Lights
Wiring Single Color LED Strip Lights with Non-Dimmable LED Drivers
For non-dimmable LED drivers, connect the strip’s positive wire to the driver’s positive terminal. Then, connect the strip’s negative wire to the driver’s negative terminal. Secure all connections and power on. This simple wiring method is great for basic installations. They do not require dimming. Non-dimmable drivers provide a constant output. This ensures that your LED strips shine at their best. When wiring multiple strips, it’s important to ensure that the total wattage does not exceed the driver’s capacity. Securing all connections is key. Follow the manufacturer’s instructions. This prevents electrical issues and ensures a safe, reliable installation.
Wiring Single Color LED Strip Lights with Dimmable LED Drivers
Dimmable LED drivers allow you to adjust the brightness. Connect the strip to the driver as described above. Follow the specific wiring diagram for your dimmer type:
– 0-10V Dimmable LED Driver Connection Diagram
A 0-10V dimmable driver uses a low voltage control signal to adjust the brightness. Connect the 0-10V dimmer to the driver’s control terminals, ensuring correct polarity. This setup allows for smooth dimming across the entire range.


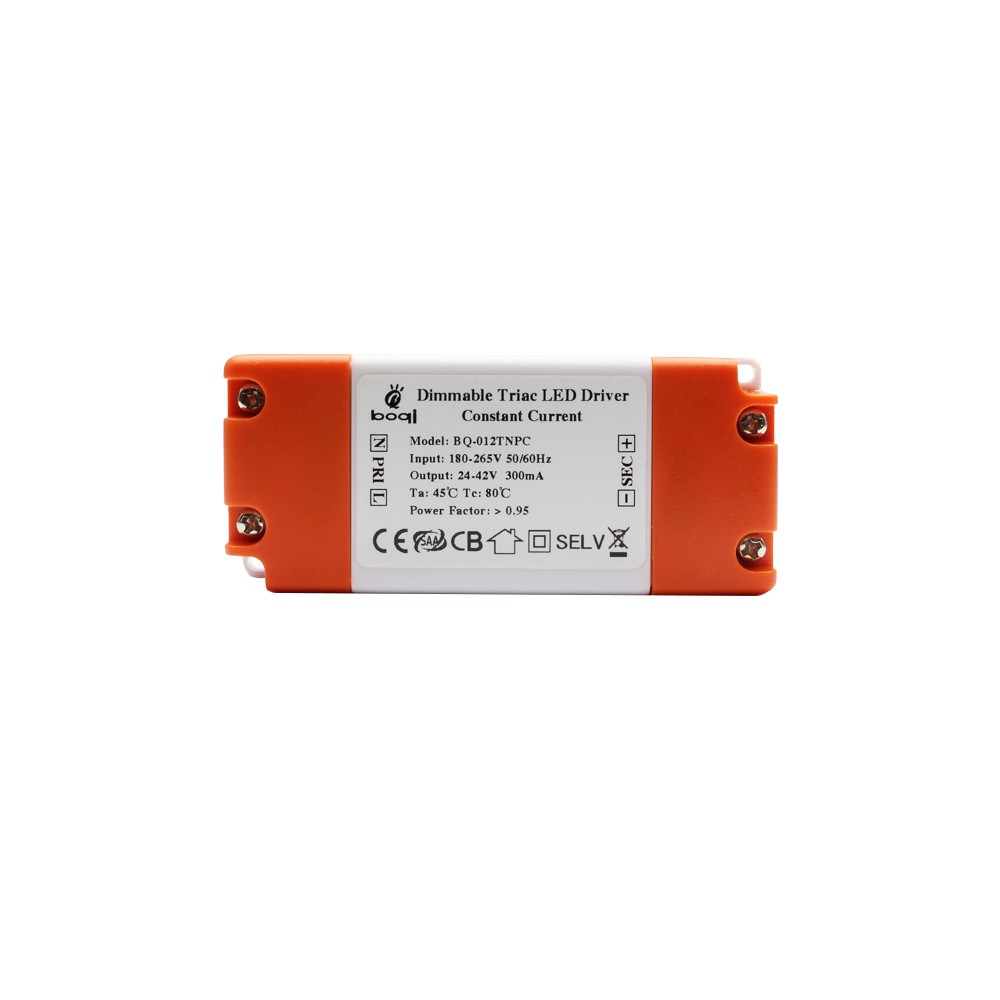
– Triac Dimmable LED Driver Connection Diagram
Triac dimmers work with AC phase-cut dimming. Connect the driver to a compatible triac dimmer switch, ensuring that the driver’s input matches the dimmer’s output. This method provides a familiar dimming experience similar to traditional incandescent bulbs.

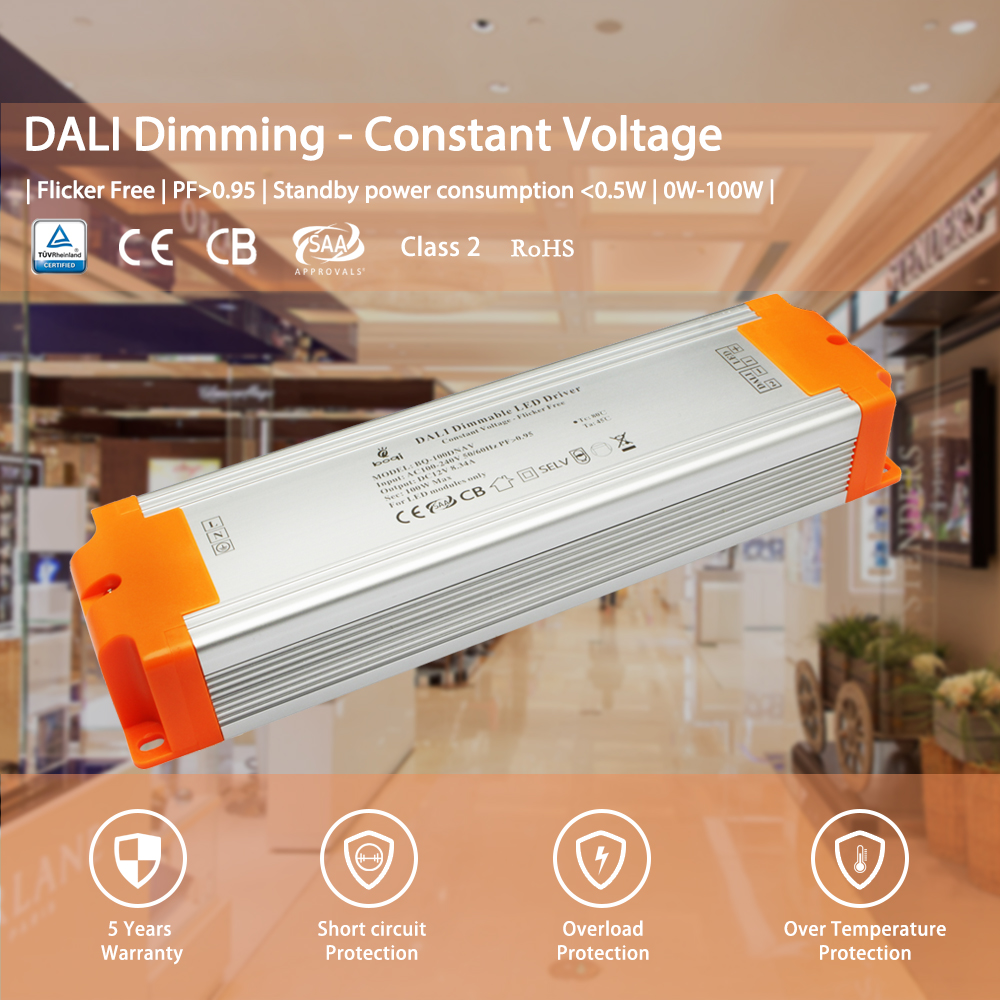
– DALI Dimmable LED Driver Connection Diagram
DALI (Digital Addressable Lighting Interface) dimmers offer precise control and programmability. Connect the DALI control lines to the driver’s DALI input terminals. This setup is ideal for complex lighting systems requiring advanced control features.

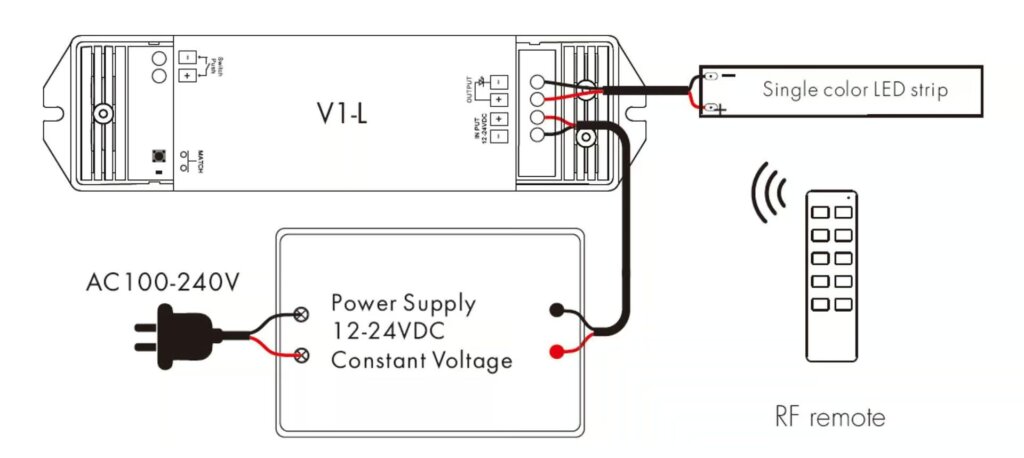
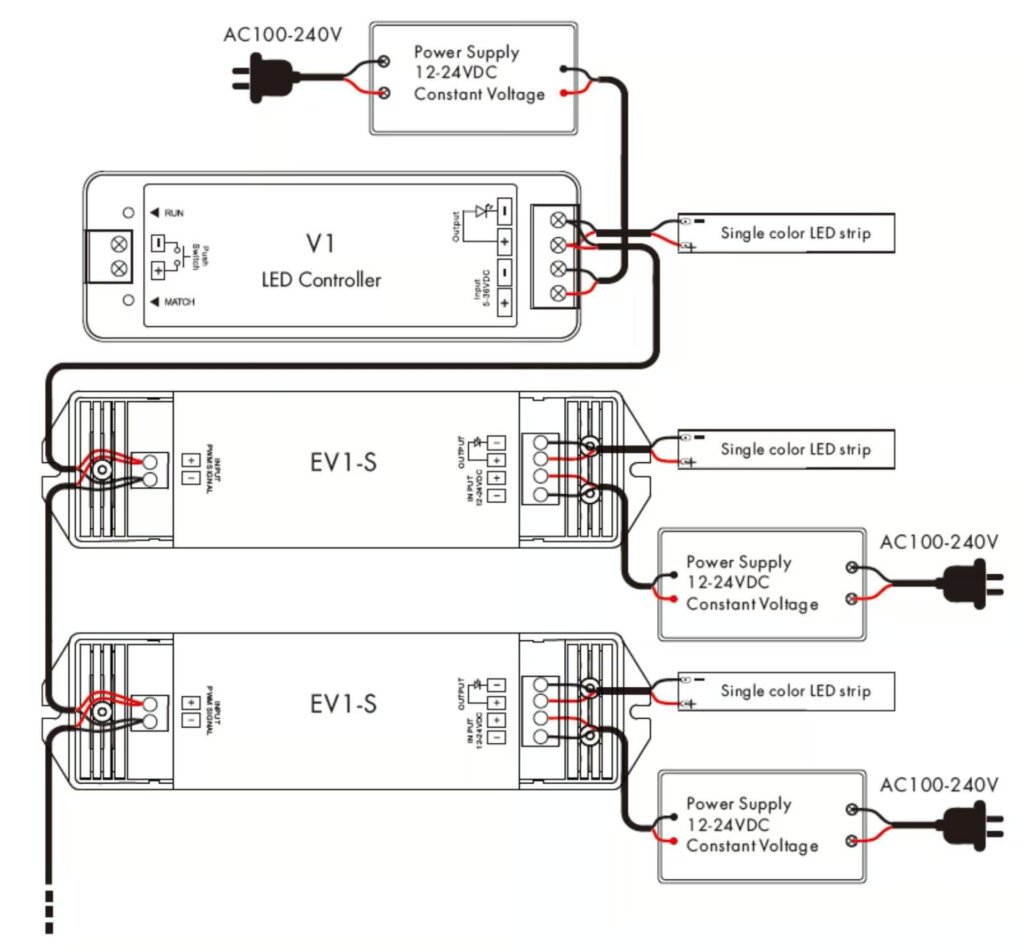
Wiring Single Color LED Strip Lights with LED Controllers
LED controllers provide more flexibility in controlling the lights. Connect the strip to the controller. Make sure the positive and negative wires match the controller’s terminals. Controllers allow for various effects, such as dimming, flashing, and custom lighting patterns. Ensure that the controller is compatible with your LED strip and power supply. Securing the connections properly is key. Following the manufacturer’s guidelines will ensure reliable operation and prevent potential issues.
Without PWM amplifier
With PWM amplifier
Wiring Single Color LED Strip Lights with DMX512 Decoder
DMX512 decoders are used for advanced lighting setups. Connect the strip to the decoder, matching the positive and negative wires to the correct terminals. DMX512 is a digital communication protocol. It is used for lighting control and provides precise control over many channels. This setup is common in stage lighting. It is also used in architectural lighting and other pro applications. Ensure the DMX512 decoder is set up right. Connect it to the DMX controller for best performance.

How to Wire Tunable White LED Strip Lights
Wiring Tunable White LED Strip Lights with Dimmable LED Drivers
Tunable white LED strips allow for color temperature adjustments. Connect the wires as per the driver’s instructions, ensuring proper connections for both color temperature and brightness control. Tunable white strips typically have additional control lines for adjusting the color temperature. These strips can transition from warm white to cool white, providing versatile lighting options. Ensure that your dimmable LED driver is compatible with tunable white strips and that all connections are secure for reliable operation.
DALI DT8 Tunable White LED Driver
DALI DT8 drivers are used for precise control of tunable white strips. Follow the wiring diagram provided by the manufacturer. DALI DT8 drivers support tunable white LED strips. They allow independent control of brightness and color temperature. This advanced control capability is ideal for applications requiring dynamic lighting environments. Properly wiring and configuring the DALI DT8 driver ensures smooth operation and optimal performance of your tunable white LED strips.

Wiring Tunable White LED Strip Lights with LED Controllers
Connect the tunable white strip to the controller, matching the positive and negative terminals. Ensure secure connections for reliable operation. LED controllers for tunable white strips allow for precise adjustments in color temperature and brightness. These controllers often come with remote controls or can be integrated into smart home systems for added convenience. Proper installation and configuration of the controller ensure consistent and reliable operation.
Without PWM amplifier

Wiring Tunable White LED Strip Lights with DMX512 Decoder

Use a DMX512 decoder for tunable white strips in advanced setups. Connect the strip to the decoder, following the wiring diagram for proper installation. DMX512 decoders provide fine control over color temperature and brightness. They are ideal for professional lighting. Ensure that the decoder is correctly connected to the DMX controller and that all connections are secure for optimal performance.
Two Wires Tunable White LED Strip Lights
Simpler tunable white strips use two wires for color temperature control. Connect these wires to the appropriate terminals on your controller or driver. This type of tunable white strip typically has a simpler wiring configuration, making it easier to install. However, it may offer fewer control options compared to more advanced tunable white systems. Ensure that your controller or driver is compatible with the two-wire configuration for reliable operation.

How to Wire RGB LED Strip Lights
Wiring RGB LED Strip Lights with Dimmable LED Drivers
Connect the RGB strip to the dimmable driver, matching the red, green, and blue wires to the corresponding terminals. Use the wiring diagram provided. Dimmable drivers for RGB strips allow you to adjust the brightness of the entire strip. However, color control will require an additional RGB controller. Ensure that all connections are secure and that the driver is compatible with your RGB strip for reliable operation.
DALI DT8 RGB LED Driver
For advanced RGB control, use a DALI DT8 driver. Follow the manufacturer’s wiring diagram for precise installation. DALI DT8 drivers provide separate control over each color. This allows for complex lighting and precise color mixing. This advanced control is great for apps that need dynamic lighting. They need lighting that can be customized. Proper installation and setup of the DALI DT8 driver make sure your RGB LED strips work well. They will have the best performance.

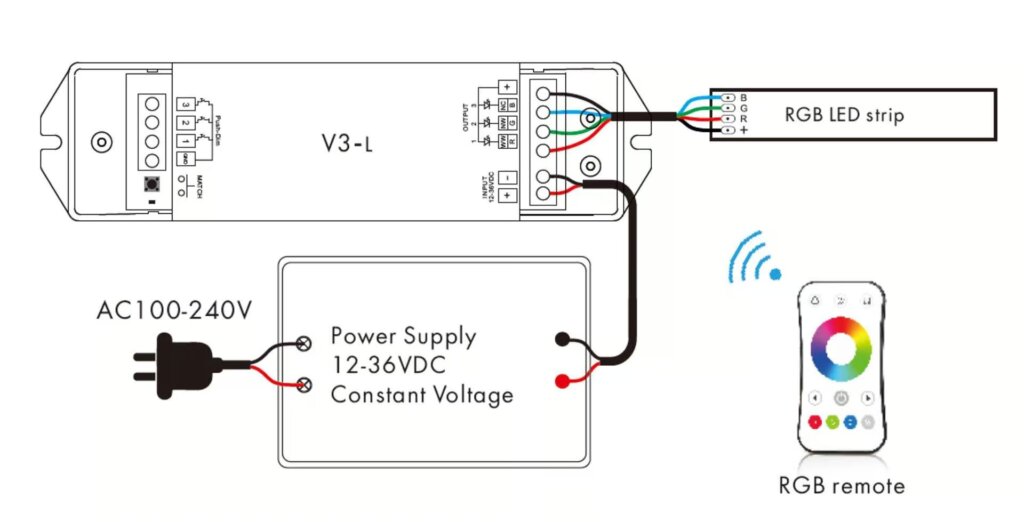
Wiring RGB LED Strip Lights with LED Controllers
Connect the RGB strip to the controller, ensuring each color wire is connected to the appropriate
terminal. RGB controllers allow for various lighting effects, such as color changing, flashing, and custom patterns. Ensure that the controller is compatible with your RGB strip and power supply. Properly securing the connections and following the manufacturer’s guidelines will help ensure reliable operation and prevent potential issues.
Without PWM amplifier
With PWM amplifier

Wiring RGB LED Strip Lights with DMX512 Decoder
Use a DMX512 decoder for RGB strips in complex setups. Follow the wiring diagram to ensure correct installation. DMX512 decoders provide precise control over each color channel, allowing for intricate lighting effects and precise color mixing. This setup is commonly used in professional lighting applications, such as stage lighting and architectural lighting. Make sure the DMX512 decoder is set up right. Connect it to the DMX controller for the best performance.

How to Wire RGBW LED Strip Lights
Wiring RGBW LED Strip Lights with Dimmable LED Drivers
Connect the RGBW strip to the dimmable driver, ensuring all color wires (red, green, blue, white) are connected correctly. Dimmable drivers for RGBW strips allow you to adjust the brightness of the entire strip. However, color control will require an additional RGBW controller. Ensure that all connections are secure and that the driver is compatible with your RGBW strip for reliable operation.
DALI DT8 RGBW LED Driver
For advanced RGBW control, use a DALI DT8 driver. Follow the manufacturer’s wiring instructions. DALI DT8 drivers provide separate control over each color. This allows for complex lighting effects and precise color mixing. This advanced control is great for applications. They need dynamic and customizable lighting. The DT8 driver must be properly installed and configured. This ensures smooth and optimal performance of your RGBW LED strips.

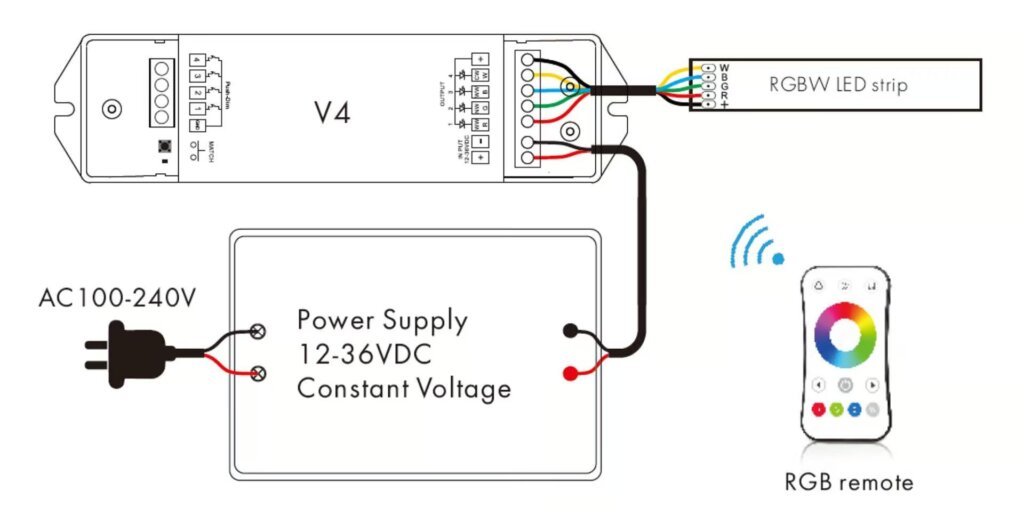
Wiring RGBW LED Strip Lights with LED Controllers
Connect the RGBW strip to the controller, matching all color wires to the correct terminals. RGBW controllers allow for various lighting effects, such as color changing, flashing, and custom patterns. Ensure that the controller is compatible with your RGBW strip and power supply. Securing the connections properly and following the manufacturer’s guidelines will help. It will ensure reliable operation and prevent issues.
Without PWM amplifier
With PWM amplifier

Wiring RGBW LED Strip Lights with DMX512 Decoder
Use a DMX512 decoder for RGBW strips in advanced setups. Follow the wiring diagram for proper installation. DMX512 decoders give precise control over each color channel. They allow for complex lighting effects and exact color mixing. This setup is common in professional lighting. It is used for stage and architectural lighting. Make sure the DMX512 decoder is set up and connected to the DMX controller. This is needed for best performance.

How to Wire RGB & CCT LED Strip Lights
Wiring RGBW LED Strip Lights with Dimmable LED Drivers
Follow the wiring diagram to connect the RGBW strip to a dimmable driver, ensuring all connections are secure. Dimmable drivers for RGBW strips allow you to adjust the brightness of the entire strip. However, color control will require an additional RGBW controller. Ensure that all connections are secure and that the driver is compatible with your RGBW strip for reliable operation.
Wiring RGBW LED Strip Lights with LED Controllers
Connect the strip to the controller, matching the wires to the appropriate terminals. RGBW controllers allow for various lighting effects, such as color changing, flashing, and custom patterns. Ensure that the controller is compatible with your RGBW strip and power supply. Properly securing the connections and following the manufacturer’s guidelines will help ensure reliable operation and prevent potential issues.
Without PWM amplifier

With PWM amplifier

Wiring RGBW LED Strip Lights with DMX512 Decoder
Use a DMX512 decoder for complex setups. Follow the wiring diagram to ensure proper installation. DMX512 decoders provide precise control over each color channel. They allow for complex lighting effects and exact color mixing. This setup is commonly used in professional lighting applications, such as stage lighting and architectural lighting. Ensure the DMX512 decoder is properly configured. Connect it to the DMX controller for best performance.

How to Wire Addressable LED Strip Lights
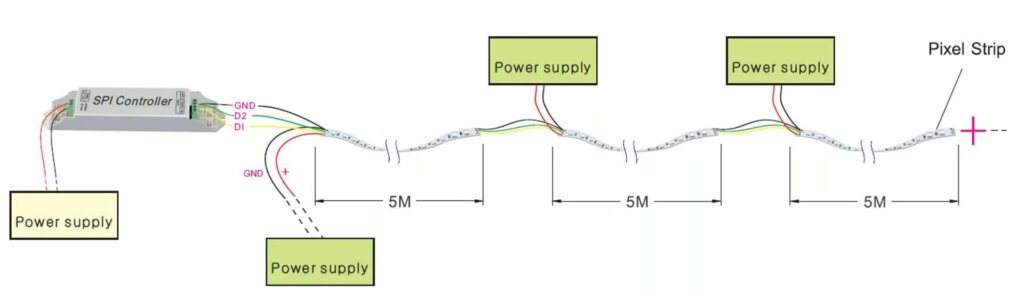
How to Wire SPI Addressable LED Strip Lights
Connect the data and power wires of the SPI addressable strip to the controller, following the wiring diagram provided. Addressable LED strips allow for individual control of each LED, enabling complex lighting effects and patterns. Ensure that the controller is compatible with your SPI addressable strip and that all connections are secure. Properly configuring the controller and following the manufacturer’s instructions will help ensure reliable operation and prevent potential issues.
SPI Addressable LED Strip Lights with Data Channel Only
Ensure the data wire is connected securely to the controller. This setup allows for basic control of addressable LEDs. It lets you make custom lighting effects. Properly securing the data wire and following the wiring diagram will help ensure reliable operation and prevent potential issues.

SPI Addressable LED Strip Lights with Data and Clock Channels
Connect both data and clock wires to the controller, ensuring secure connections. This setup allows for more precise control of the addressable LEDs, enabling complex lighting effects and patterns. Properly configuring the controller and following the manufacturer’s instructions will help ensure reliable operation and prevent potential issues.

SPI Addressable LED Strip Lights with Data and Backup Data Channels
Follow the wiring diagram to connect data, clock, and backup data wires to the controller. This configuration provides redundancy, ensuring reliable operation even if one data channel fails. Securing all connections properly is key. Following the manufacturer’s instructions will help. It ensures reliable operation and prevents potential issues.
How to Wire DMX512 Addressable LED Strip Lights
Use a DMX512 decoder for addressable strips. Follow the wiring diagram for proper installation. DMX512 decoders provide precise control over each LED, enabling complex lighting effects and patterns. This setup is commonly used in professional lighting applications, such as stage lighting and architectural lighting. Ensure the DMX512 decoder is set up right. Connect it to the DMX controller. This is key for top performance.

FAQs
- How are strip LEDs wired?
- For each segment, the LEDs are wired in series, which means the operating voltages are added up, giving the higher voltage needed. All segments are wired in parallel, so they receive the same voltage, but the current draw increases with the length of the strip. Understanding this wiring method helps maintain consistent brightness and prevents issues such as uneven lighting or flickering.
- What are the colors of the wires on LED light strips?
- RGB strip light has a 4-wire connection: green, red, blue for the LEDs, and black/white for the common +12V connection. Properly matching these wires to the corresponding terminals on the controller or power supply ensures correct operation and color mixing.
- What are 4 wires in LED strip light?
- For RGB strips, you need 4 wires: one neutral (yellow) and the rest control the 3 LED colors (Red, Green, Blue). Connecting these wires correctly ensures proper color control and operation of the strip.
- How many wires for an LED strip?
- The RGBW LED strip has five wires: red, green, blue, white, and positive. Connect the LED light strip to the corresponding mark on the RGBW LED light controller. Ensuring all connections are secure and following the wiring diagram provided by the manufacturer will help prevent potential issues and ensure reliable operation.
Conclusion
Wiring LED strip lights don’t have to be intimidating. With this guide, you now have the knowledge to tackle various types of LED strip lights, ensuring a successful and safe installation. Happy lighting!
Closing
Selecting the appropriate Flicker-Free dimmable LED drivers is pivotal for optimizing your lighting, thereby enhancing your overall well-being and comfort. The absence of flicker is crucial to the level of comfort perceived within your living spaces.
In this article, we delve into the following aspects to guide you in selecting the ideal flicker-free dimming LED Drivers:
We will explore essential features such as specifications, compatibility, and efficiency to circumvent any flickering in the lighting. Additionally, we will discuss the importance of High PWM frequency to achieve flicker-free results in the dimmable LED Driver series.
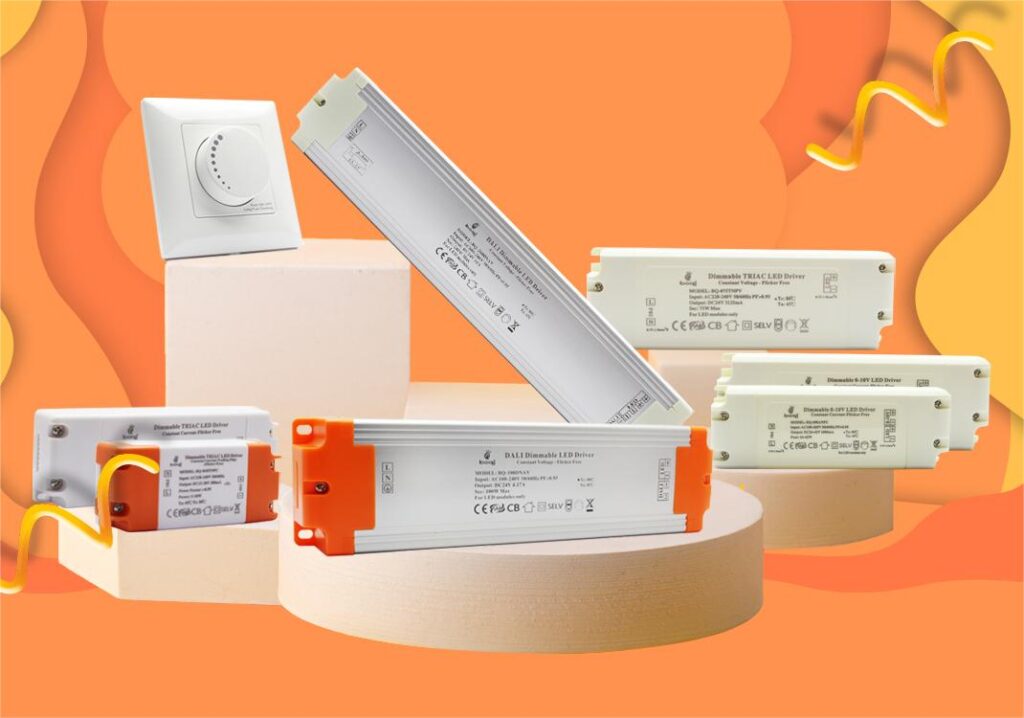
Buy Dimmable LED Drivers from boqi
Being informed about the prevalent causes of light flicker is essential, but the task of selecting the suitable dimmable LED driver is still at hand. To realize the desired lighting and dimming effects, connecting with a reputable LED driver manufacturer is imperative. boqi stands out as a renowned manufacturer of dimmable LED drivers, offering an array of flicker-free, dimmers, and controllers. The product range includes TRIAC, 0-10V, and DALI LED drivers, dimmers, and controllers.
Operating with manufacturing bases in China, the company is attuned to the distinct needs and specifications of its clientele. For inquiries regarding your LED driver or controller needs, do not hesitate to reach out, allowing us to assist you in refining your selections.