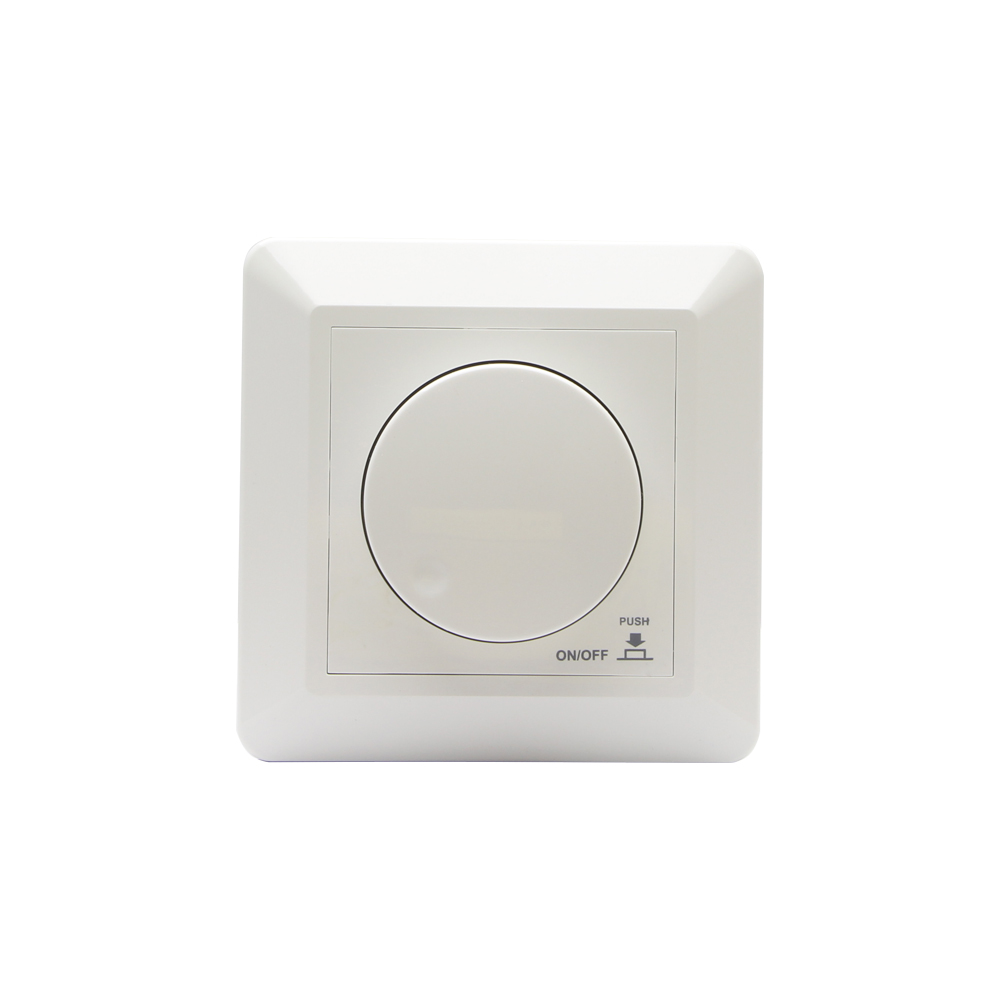
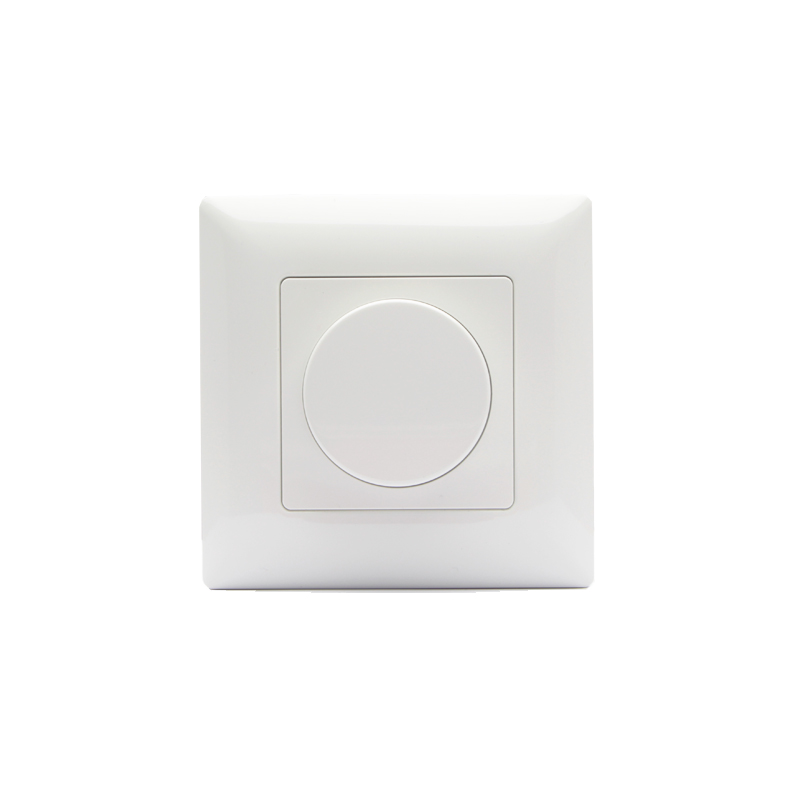
LED 调光器 have revolutionized the way we control lighting in various settings, from homes and offices to commercial and industrial spaces. They offer the flexibility to adjust the brightness level of LED lights, thereby enhancing the ambiance, improving energy efficiency, and even contributing to well-being. In this article, we'll walk you through the steps to wire an LED dimmer, complete with a diagram for better understanding.
LED 调光器的类型
Before diving into the wiring process, it's important to understand the types of LED dimmers available:
- 相切调光器:适用于住宅应用,是最常见的调光器类型。
- 前沿和后沿 TRIAC 调光器:适用于 LED 可调光照明或传统照明,是兼容性极强的调光器类型。
- 0-10V 调光器:常用于商业和工业环境,提供精确控制。
- DALI 调光器: 它们通常是面板,由 DALI 主控器控制,适用于智能系统和以人为本的照明。
- 智能调光器:这些调光器支持 Wi-Fi 或蓝牙,可通过智能手机或语音指令进行控制。

常见调光器接线工作
准备的组件
- LED 灯具或灯泡
- LED 兼容调光开关
- 电线(通常为 14 号或 12 号电线)
- 导线螺母或连接器
- 螺丝刀
- 剥线器
- 电压测试仪
- 可选:接线盒

安全预防措施
- 在开始任何电气工作之前,一定要关闭断路器上的电源。
- 使用电压测试仪确保电源已关闭。
- 遵守当地的电气规范和规定。
- If you're unsure about any step, consult a qualified electrician.
图表
  +----------------+ +-------------------+
  | | | |
  | LED调光器 |------| LED驱动器 |
  | | | |
  +----------------+ +-------------------+
                             |
                             |
                             |
                     +----------------+
                     | |
                     | LED灯
                     | |
                     +----------------+
简明通用分步指南
步骤 1:关闭电源
关闭断路器电源,使用电压测试仪确认电源已关闭。
步骤 2:准备导线
用剥线钳从将要连接的电线两端剥去约半英寸的绝缘层。
步骤 3:确定电线
Typically, you'll have the following wires:
- 棕色/黑色:热导线
- 蓝色/白色:中性线
- 绿色/黄色或裸铜:接地线

步骤 4:连接调光器
- 接地线:用接线螺母将调光器的接地线连接到电气箱的接地线上。
- 中性线:如果调光器有中性线(通常为白色),则将其连接到电箱的中性线上。
- 热丝:将调光器的黑线连接到电箱的黑线(热)上。
步骤 5:连接 LED 灯
- Connect the other end of the black (hot) wire to the LED light's black wire.
- Connect the other end of the white (neutral) wire to the LED light's white wire.
- Connect the other end of the ground wire to the LED light's ground wire.
步骤 6:确保所有连接安全
使用导线螺母或适当的连接器固定所有连接。确保没有裸线外露。
步骤 7:测试
Turn the power back on at the circuit breaker and test the dimmer to ensure it's working as expected.
5 种调光器的详细指南
相切调光器
Wiring a phase-cut dimmer can be a complex task that involves working with high-voltage electrical circuits. Incorrect wiring can result in electrical shock, fire, or damage to the dimmer and other electrical components. If you're not experienced with electrical work, it's strongly recommended that you consult with or hire a qualified electrician to perform the installation.
尽管如此,如果您熟悉电气工作并采取了所有必要的安全预防措施,以下是如何为切相调光器布线的一般指南:
所需工具和材料
- 螺丝刀
- 剥线钳
- 电工胶带
- 电线螺母
- 万用表
- 相切调光开关
- 适当的电气箱和盖板

安全预防措施
- Turn off the power to the circuit you'll be working on at the circuit breaker.
- 使用万用表确认电源已关闭。
- 穿戴适当的安全装备,包括手套和护目镜。
步骤
- 识别电线:打开电箱并识别电线。您应该看到一根黑色(热)线、一根白色(中性)线,可能还有一根绿色或裸铜(接地)线。
- 准备调光器: Unpack the phase-cut dimmer and read the manufacturer's instructions carefully. Identify the wires or terminals on the dimmer. Typically, you'll see similar colors: black (or red) for the hot wire, white for the neutral, and green for ground.
- 断开旧开关: If you're replacing an old switch, disconnect it by unscrewing the wire nuts and separating the wires.
- 将调光器与灯具(可调光 LED 驱动器)连接: ① Connect Dimmer #4 port's wire of LED driver's INPUT -L port. ② Connect the output terminals of LED driver (LED+/LED-) to the input terminals of the light fixtures ③ Connect the dimmer's L2 to electricity L line, and LED driver's N to electricity N Line. (line with AC marked in the diagram)
- 连接中性线:如果调光器需要中性线连接,则将电箱中的白线连接到调光器上的白线或端子上。使用导线螺母固定连接。
- 连接热线:将电箱中的黑色(热)导线连接到调光器上的黑色(或红色)导线或端子上。用导线螺母固定连接。
- 折叠和固定:小心地将电线塞回电箱,确保所有电线螺母都牢固。
- 安装调光器: Screw the dimmer into the electrical box, following the manufacturer's instructions.
- 安装盖板:在调光器上装上盖板。
- 测试: Turn the power back on at the circuit breaker and test the dimmer to make sure it's working as expected.


Remember, this is a general guide. Always follow the manufacturer's instructions and local electrical codes. If you're unsure about any step, consult a qualified electrician.

前沿和后沿 TRIAC 调光器
前沿和后沿调光器是用于控制灯光亮度的相位切断调光器类型。前沿调光器切断每个交流周期的起始相位,而后沿调光器则切断结束相位。这些调光器通常用于白炽灯、卤素灯以及某些类型的 LED 和 CFL 灯。
备注: Working with electrical circuits can be dangerous. If you're not experienced, it's strongly recommended to consult or hire a qualified electrician. Incorrect wiring can result in electrical shock, fire, or damage to the dimmer and other electrical components.
所需工具和材料
- 螺丝刀
- 剥线钳
- 电工胶带
- 电线螺母
- 万用表
- 前沿或后沿调光开关
- 电气箱和盖板
- 安全装备(手套、护目镜)

安全预防措施
- Turn off the power to the circuit you'll be working on at the circuit breaker.
- 使用万用表确认电源已关闭。
- 穿戴适当的安全装备,包括手套和护目镜。
一般布线步骤
- 识别电线: Open the electrical box and identify the wires. Typically, you'll see a black (hot) wire, a white (neutral) wire, and possibly a green or bare copper (ground) wire.
- 准备调光器: Unpack the dimmer and read the manufacturer's instructions carefully. Identify the wires or terminals on the dimmer. You'll usually see similar colors: black (or red) for the hot wire, white for the neutral, and green for ground.
- 断开旧开关: If you're replacing an old switch, disconnect it by unscrewing the wire nuts and separating the wires.
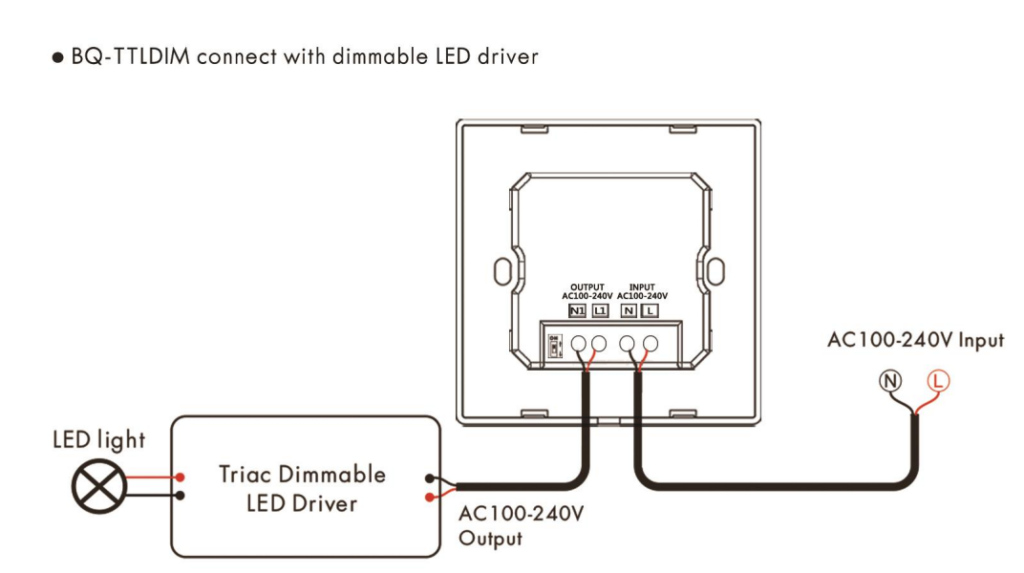
- 将调光器与灯具(可调光 LED 驱动器)连接: ① Connect Dimmer OUTPUT (AC100-240V) wires of LED driver's AC input (N, L). ② Connect the output terminals of LED driver (LED+/LED-) to the input terminals of the light fixtures. ③ Connect the dimmer INPUT (AC100-240V) to electricity (line with AC marked in the diagram)
- 连接中性线:如果调光器需要中性线连接,则将电箱中的白线连接到调光器上的白线或端子上。使用导线螺母固定连接。
- 连接热线:将电箱中的黑色(热)导线连接到调光器上的黑色(或红色)导线或端子上。用导线螺母固定连接。
- 折叠和固定:小心地将电线塞回电箱,确保所有电线螺母都牢固。
- 安装调光器: Screw the dimmer into the electrical box, following the manufacturer's instructions.
- 安装盖板:在调光器上装上盖板。
- 测试: Turn the power back on at the circuit breaker and test the dimmer to make sure it's working as expected.


其他考虑因素
- 兼容性:确保调光器与您使用的灯具类型兼容(如 LED、白炽灯、卤素灯)。
- 负载要求:检查调光器的负载要求,确保与要控制的灯的总瓦数相匹配。
- 多路开关: If you're installing a dimmer in a multi-way switching arrangement (e.g., 3-way switch), make sure to get a dimmer that supports this and follow the specific wiring instructions for multi-way setups.
Always follow the manufacturer's instructions and local electrical codes. If you're unsure about any step, consult a qualified electrician.
0-10V調光器
0-10V 调光控制方法是照明控制应用的标准,尤其适用于商业和工业环境。该系统使用低压信号来控制灯具的调光级别。电压信号的范围从 0V(关灯)到 10V(全亮),亮度在两者之间变化。
基本组件:
- 具有 0-10V 调光功能的灯具
- 0-10V 调光器或控制器
- 低压控制线(通常为 18-22 AWG)
- 电源(根据灯具要求)
- 可选:自动化系统或楼宇管理系统(BMS)

接线步骤:
- LED 驱动器:确保灯具和 0-10V 调光器正确连接到各自的电源,遵守所有安全指南和当地电气法规。
- 控制线:另外两根线用于 0-10V 控制信号。一根用于正极控制信号 (+),另一根用于控制信号接地 (-)。
- 与灯具的连接:将控制线连接到灯具上的相应端子上,通常标有 "DIM+"和 "DIM-"或类似标记。
- 与调光器的连接:将控制线的另一端连接到 0-10V 调光器或控制器的相应端子上。
- 极性:确保在连接控制线时保持正确的极性。正极电线应连接到灯具和调光器上的 "DIM+"端子,负极电线应连接到 "DIM-"端子。
- 可选自动化: If you are integrating the 0-10V dimming system into a larger automation or BMS, ensure that the control wires are properly connected to the system's interface.
- 测试:完成所有连接后,接通系统电源并测试调光功能,以确保其工作状态符合预期。

安全预防措施:
- 在操作任何电线之前,请务必关闭电源。
- 使用导线螺母或适当的连接器固定所有连接。
- 遵守当地所有电气规范和规定。
- 如果对任何步骤不确定,请咨询合格的电工。
0-10V 调光系统以其可靠性而著称,广泛应用于需要精确控制光照度的场合,如商业建筑、工业环境,并越来越多地应用于配备先进照明控制系统的智能家居。
DALI 调光器
数字可寻址照明接口(DALI)是一种用于控制楼宇照明的协议,以其简便性和稳健性而著称。DALI 调光器用于控制与 DALI 兼容的照明设备。与传统调光器不同,DALI 调光器以数字方式与照明灯具通信,从而实现更精确的控制以及分组和场景设置等附加功能。
安全预防措施
- Always turn off the power to the circuit you'll be working on at the circuit breaker.
- 使用万用表确认电源已关闭。
- 穿戴适当的安全装备,包括手套和护目镜。
- If you're not experienced with electrical work, consult or hire a qualified electrician.
所需工具和材料
- 螺丝刀
- 剥线钳
- 电工胶带或热缩管
- 导线螺母或适当的连接器
- 万用表
- DALI 调光器
- 兼容 DALI 的照明装置
- DALI 控制电缆(通常为 2 线制,无极性)
DALI 调光器布线的一般步骤
- 阅读手册:开始之前,请阅读 DALI 调光器和兼容 DALI 的照明设备的安装手册,以了解具体要求和功能。
- 规划网络:DALI 网络通常采用菊花链拓扑结构,但也可以采用星形和树形拓扑结构。请据此规划网络布局。
- 关闭电源: Make sure to turn off all power to the circuits you'll be working on.
- 为调光器接通电源: Connect the power supply wires to the DALI dimmer according to the manufacturer's instructions. This usually involves connecting a live (hot), neutral, and possibly a ground wire.
- 连接 DALI 线路: DALI uses a separate 2-wire control line for communication. Connect the DALI control wires from the dimmer to the DALI-compatible lighting fixtures. DALI is generally polarity-free, meaning you don't have to worry about connecting the wires backward.
- 菊花链或星形配置: Depending on your layout plan, connect the DALI control wires to each fixture in a daisy-chain or star configuration. If you're using a daisy-chain, the DALI lines will go from the dimmer to the first fixture, then from the first fixture to the second, and so on.
- 地址:有些 DALI 系统要求为每个灯具设置地址。这通常可以通过单独的 DALI 控制器或制造商提供的软件来完成。
- 测试连接:在恢复供电之前,请仔细检查所有连接是否牢固。
- 恢复供电和测试:重新接通电源并测试系统,确保调光器可以控制预期的照明设备。
- 配置场景或组: If your DALI system supports advanced features like scene setting or grouping fixtures, you can configure these settings according to the manufacturer's instructions.

Remember, DALI systems can vary significantly in their features and requirements, so always refer to the manufacturer's documentation for the most accurate and detailed information.
智能调光器

智能调光开关的布线步骤与传统调光器的布线类似,但在将设备连接到智能家居网络时还需要考虑一些额外的因素。智能调光器可以通过智能手机应用程序、语音指令或自动化例程进行控制,它们通常需要一根中性线来提供恒定电源,以保持无线连接。
备注: Working with electrical circuits can be dangerous. If you're not experienced, it's strongly recommended to consult or hire a qualified electrician. Incorrect wiring can result in electrical shock, fire, or damage to the dimmer and other electrical components.
所需工具和材料
- 螺丝刀
- 剥线钳
- 电工胶带
- 电线螺母
- 万用表
- 智能调光开关
- 电气箱和盖板
- 安全装备(手套、护目镜)
安全预防措施
- Turn off the power to the circuit you'll be working on at the circuit breaker.
- 使用万用表确认电源已关闭。
- 穿戴适当的安全装备,包括手套和护目镜。
一般布线步骤
- 阅读手册:开始之前,请阅读智能调光器的安装手册,了解其具体要求和功能。
- 识别电线: Open the electrical box and identify the wires. Typically, you'll see a black (hot) wire, a white (neutral) wire, and possibly a green or bare copper (ground) wire.
- 准备调光器: Unpack the smart dimmer and identify the wires or terminals. You'll usually see similar colors: black (or red) for the hot wire, white for the neutral, and green for ground.
- 断开旧开关: If you're replacing an old switch, disconnect it by unscrewing the wire nuts and separating the wires.
- 连接接地线:将接地线从电气箱连接到调光器的接地线或端子上。使用导线螺母固定连接。
- 连接中性线:大多数智能调光器需要中性线连接以获得恒定电源。将电箱中的白线连接到调光器上的白线或端子上。使用导线螺母固定连接。
- 连接热线:将电箱中的黑色(热)导线连接到调光器上的黑色(或红色)导线或端子上。用导线螺母固定连接。
- 折叠和固定:小心地将电线塞回电箱,确保所有电线螺母都牢固。
- 安装调光器: Screw the smart dimmer into the electrical box, following the manufacturer's instructions.
- 安装盖板:在调光器上装上盖板。
- 恢复供电和测试: Turn the power back on at the circuit breaker and test the dimmer to make sure it's working as expected.
智能功能的其他步骤
- 连接至 Wi-Fi: Follow the manufacturer's instructions to connect the smart dimmer to your Wi-Fi network, usually via a smartphone app.
- 软件更新:某些智能调光器在安装后可能需要软件更新。这通常通过应用程序完成。
- 配置设置:使用应用程序配置日程、场景等设置,或通过亚马逊 Alexa 或 Google Assistant 等智能助手进行语音控制。
- 智能测试功能: Test the smart features to ensure they're working as expected.
Always follow the manufacturer's instructions and local electrical codes. If you're unsure about any step, consult a qualified electrician.
结论
Wiring an LED dimmer is a straightforward process if you follow the steps carefully and take necessary safety precautions. Whether you're looking to enhance your home's ambiance or improve energy efficiency in a commercial setting, an LED dimmer is a valuable addition to your lighting system.


