














ผู้ซื้อมักสอบถามทีมวิศวกรรมเซินเจิ้นของเราถึงวิธีการจับคู่ TRIAC dimmers กับ CV drivers หลังจากการติดตั้งที่เกิดการกะพริบ ข้อมูลจำเพาะที่ไม่ตรงกันเพียงหนึ่งรายการสามารถทำให้โครงการไฟทั้งหมดล้มเหลวได้.
หากต้องการจับคู่ TRIAC dimmer กับ constant-voltage LED driver ให้เลือก driver ที่ระบุอย่างชัดเจนว่ารองรับการหรี่แสงแบบ TRIAC/phase-cut จับคู่แรงดันเอาต์พุตกับโหลด LED และยืนยันว่าประเภท phase-cut ช่วงโหลด และช่วงการหรี่แสงสอดคล้องกับ dimmer การจับคู่แรงดันไฟฟ้าเพียงอย่างเดียวไม่เคยรับประกันการหรี่แสงที่ปราศจาก flicker.
คำตอบสั้นๆ นั้นซ่อนรายละเอียดทางวิศวกรรมไว้มากมาย สินค้าสองรายการอาจระบุว่า TRIAC dimmable ทั้งคู่แต่ยังทำงานร่วมกันได้ไม่ดี ในคู่มือนี้ ผมจะพาคุณผ่านข้อกำหนด โหมดความล้มเหลว กระบวนการทดสอบ และข้อกำหนดที่แน่นอนที่คุณควรระบุในใบสั่งซื้อ เป้าหมายของผมง่ายๆ คือ ช่วยให้คุณมองความเข้ากันได้เป็นห่วงโซ่ ไม่ใช่แค่ฉลาก.
ฉันควรตรวจสอบข้อกำหนดทางเทคนิคใดเพื่อยืนยันว่า TRIAC dimmer ของฉันทำงานร่วมกับไดรเวอร์ CV ได้?
ฤดูใบไม้ผลิที่ผ่านมา สายการควบคุมคุณภาพในเซินเจิ้นของเราปฏิเสธชุด drivers ที่หรี่ไฟได้อย่างสมบูรณ์แบบกับ wall dimmer ตัวหนึ่ง แต่กระตุกอย่างรุนแรงกับอีกตัวหนึ่ง ทั้งสอง datasheet ระบุว่า TRIAC dimmable.
ตรวจสอบห้าข้อกำหนด: ค่าการรองรับ TRIAC/phase-cut dimming ที่ชัดเจนของ driver, ประเภทเฟสที่รองรับ (leading-edge หรือ trailing-edge), ช่วงโหลดขั้นต่ำและสูงสุดของ dimmer, แรงดันเอาต์พุตของ driver เทียบกับโหลด LED ของคุณ และรายการความเข้ากันได้ของ dimmer ที่ผู้ผลิตทดสอบแล้ว.
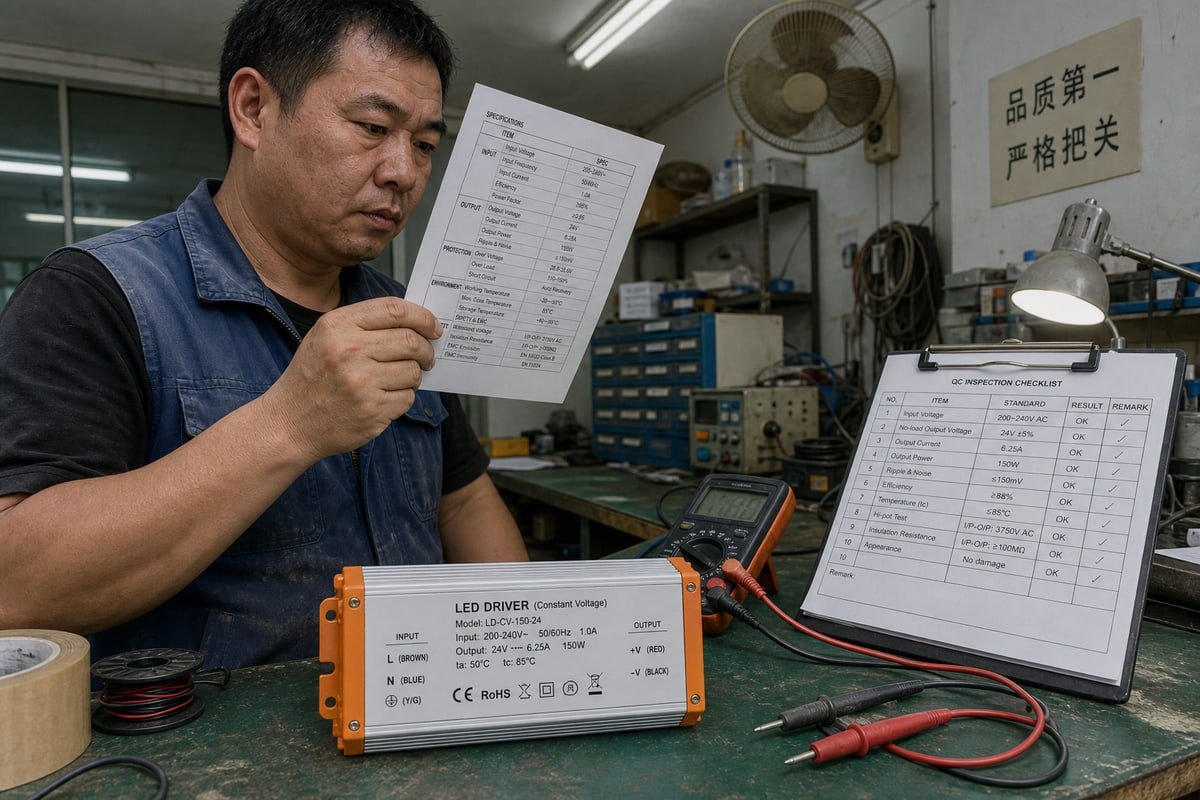
สูตรการจับคู่หลักที่ผมให้ผู้ซื้อทุกคนคือ: TRIAC dimmer → TRIAC/การตัดเฟส compatible CV driver → โหลด LED ที่แรงดันตรงกัน ตัวอย่างที่เป็นรูปธรรม: TRIAC dimmer ขนาด 120/230V AC ป้อนให้ ไดรเวอร์ CV แบบหรี่แสงได้ด้วย TRIAC, ขนาด 24V ซึ่งจ่ายไฟให้ แถบ LED 24V. หากห่วงโซ่ใดห่วงโซ่หนึ่งขาด การหรี่ไฟจะล้มเหลว ไดรเวอร์แรงดันคงที่ 1 ทั่วไปไม่สามารถตีความรูปคลื่น AC ที่ถูกตัดได้ มันจะปฏิเสธการหรี่ไฟ กะพริบทันที หรือปิดตัวลง ดังนั้นคำว่า "phase-cut" หรือ "TRIAC dimmable" ต้องปรากฏบนฉลากของ driver เช่นเดียวกับการพิมพ์ข้อกำหนดที่เราวางบนพื้นผิวด้านบนของตัวเครื่องอะลูมิเนียมของเรา.
ห่วงโซ่ข้อกำหนด
| ข้อมูลจำเพาะ | หาได้จากที่ไหน | สิ่งที่ต้องยืนยัน |
|---|---|---|
| ค่าการรองรับ Phase-cut dimming | Datasheet ของ driver หรือการพิมพ์บนตัวเครื่อง | ระบุ TRIAC, phase-cut หรือ forward-phase อย่างชัดเจน |
| ประเภทเฟส | Datasheet ของ dimmer และ driver | การรองรับ leading-edge และ trailing-edge ตรงกัน |
| ช่วงโหลด | Datasheet ของ dimmer | โหลดอินพุตของ driver อยู่ในช่วงขั้นต่ำและสูงสุดที่รองรับ LED |
| แรงดันเอาต์พุต | ฉลากเอาต์พุตของ driver | ตรงกับแถบ LED 12V หรือ 24V อย่างแม่นยำ |
| รายการความเข้ากันได้ | เว็บไซต์ผู้ผลิต | รุ่น dimmer ที่คุณใช้ปรากฏว่าผ่านการทดสอบ |
Leading Edge เทียบกับ Trailing Edge
ความแตกต่างระหว่าง leading edge และ trailing edge สำคัญที่สุด CV TRIAC drivers ส่วนใหญ่ รวมถึงรุ่นมาตรฐานที่เราผลิต ถูกออกแบบมาสำหรับ leading-edge หรือ forward-phase dimmers เป็นหลัก บางรุ่นสามารถปรับแต่งสำหรับ trailing-edge หรือ reverse-phase ได้ ซึ่งสอดคล้องกับ ELV และ MLV dimmers โดยประมาณ: MLV dimmers ใช้ การหรี่แสงแบบตัดเฟสขอบนำ 2, ในขณะที่ ELV dimmers ใช้ trailing-edge การจับคู่ driver ที่รองรับเฉพาะ leading-edge กับ ELV dimmer เสี่ยงต่อการเกิดเสียงหึ่ง ความร้อนเกิน หรือความเสียหายของชิ้นส่วน อย่าคิดว่าแบบหนึ่งครอบคลุมอีกแบบหนึ่ง.
นอกจากนี้ ตรวจสอบว่า driver หรี่ไฟฝั่ง DC ด้วยสัญญาณเอาต์พุต PWM PWM เป็นวิธีมาตรฐานในอุตสาหกรรมสำหรับการหรี่โหลด constant-voltage เพราะรักษาอุณหภูมิสีให้คงที่ตลอดช่วงการหรี่.
ทำไมไฟ LED ของฉันถึงกะพริบหรือมีเสียงหึ่งเมื่อฉันจับคู่ไดม์เมอร์ TRIAC กับไดรเวอร์แรงดันคงที่?
ผู้จัดการฝ่ายจัดซื้อในสิงคโปร์เคยส่งวิดีโอ WhatsApp เกี่ยวกับไฟแขวนที่มีเสียงหึ่งให้ผมดู ช่างติดตั้งของเธอโทษแถบ LED การทดสอบบนโต๊ะของเราพบต้นตอที่แท้จริงภายในไม่กี่นาที.
ไฟ LED กระพริบหรือมีเสียงฮัมเนื่องจาก TRIAC ไม่สามารถรักษากระแสโฮลดิ้ง (holding current) ได้ที่มุมการนำไฟฟ้าต่ำ ซึ่งมักเกิดจากโหลดไม่เพียงพอ การขาดวงจร bleeder แบบแอคทีฟ ความถี่ PWM ต่ำเกินไป หรือความไม่เข้ากันของประเภทเฟสระหว่างตัวหรี่ไฟและไดรเวอร์แรงดันคงที่.
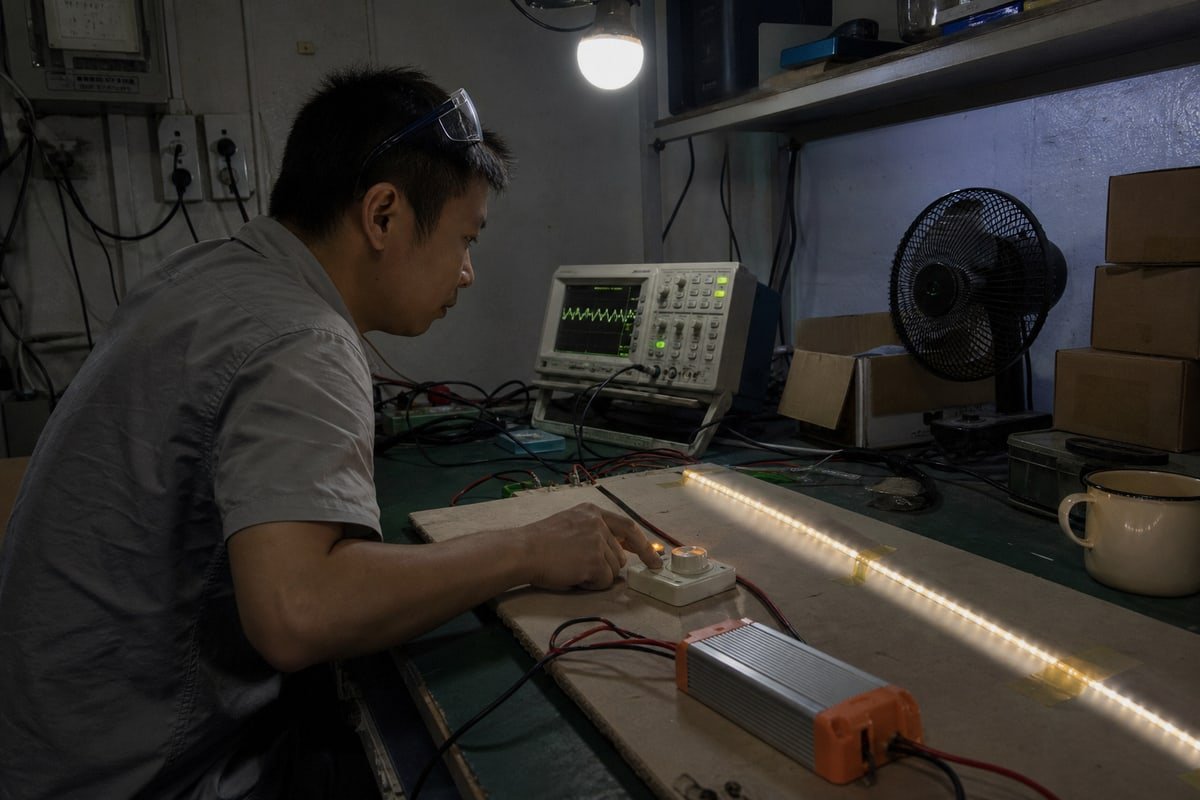
ปัญหาหลักคือประวัติศาสตร์ TRIAC dimmers ถูกสร้างขึ้นสำหรับหลอดไส้ซึ่งดึงกระแสไฟฟ้าแบบ resistive สูง dimmable LED power supply สมัยใหม่ดึงกระแสน้อยกว่ามากและมีพฤติกรรมแตกต่างอย่างมากที่ขั้นอินพุต TRIAC ต้องใช้กระแส latching เพื่อจุดไฟและกระแส holding เพื่อรักษาการนำไฟฟ้า เมื่อโหลด LED เบาเกินไป TRIAC จะจุดผิดพลาดหรือหลุดออกกลางรอบ ผลลัพธ์คือการสั่นไหวที่มองเห็นได้ การหลุดที่มุมนำต่ำ หรือไฟที่ไม่ยอมปิดสนิท.
นี่คือเหตุผลที่ drivers ที่ออกแบบมาอย่างดีมีวงจร active bleeder ในตัว วงจร bleeder ดึงกระแสเพียงพอเพื่อรักษา TRIAC ให้ทำงานแม้เมื่อ LEDs ถูกหรี่ต่ำมาก วิศวกรของเราปรับวงจรนี้อย่างระมัดระวังเพราะการ bleed น้อยเกินไปทำให้เกิดการกะพริบ และมากเกินไปทำให้สิ้นเปลืองพลังงานเป็นความร้อน.
แผนที่อาการสู่สาเหตุ
| อาการ | สาเหตุที่เป็นไปได้ | วิธีแก้ไขในทางปฏิบัติ |
|---|---|---|
| การกะพริบที่ระดับต่ำ | กระแส holding ไม่คงที่ | Driver ที่มี active bleeder; เพิ่มโหลด |
| เสียงฮัมที่ได้ยิน | Phase-type mismatch หรือการสั่นของขดลวด | จับคู่ leading หรือ trailing edge อย่างถูกต้อง |
| โซนตายก่อนการเปิดใช้งาน | การตีความรูปคลื่นช่วงปลายต่ำที่ไม่ถูกต้อง | ระบุจุดหรี่แสงต่ำสุดที่ผ่านการทดสอบ |
| ไฟดับเมื่อหรี่แสงลึก | มุมนำกระแสต่ำทำให้ TRIAC ขาดพลังงาน | เพิ่มโหลดขั้นต่ำ; ปรับแต่งค่า trim ของตัวหรี่แสง |
| อาการสั่นไหวบนกล้อง | ความถี่ PWM ต่ำ | ระบุเอาต์พุต PWM สูงกว่า 3kHz |
แถวสุดท้ายสำคัญกว่าที่ผู้ซื้อส่วนใหญ่คิด ความถี่ PWM ที่สูงกว่า 3kHz ช่วยกำจัด เอฟเฟกต์ล้อเกวียนแบบสโตรโบสโคปิก 3, ซึ่งจำเป็นสำหรับประสิทธิภาพที่ปราศจากการกะพริบในพื้นที่ค้าปลีกที่มีการบันทึกวิดีโอหรือสภาพแวดล้อมที่มีเครื่องจักรเคลื่อนที่ อีกหนึ่งความละเอียดอ่อน: การสตาร์ทแบบกระแทกซ้ำๆ ของรูปคลื่นแบบ phase-cut ทำให้ตัวเก็บประจุอินพุตของไดรเวอร์รับภาระมากกว่าการจ่ายไฟ AC ที่คงที่ ดังนั้นการป้องกันกระแสไฟกระชากจึงส่งผลโดยตรงต่ออายุการใช้งานของไดรเวอร์ ไม่ใช่แค่การตัดวงจรของเบรกเกอร์เท่านั้น.
ฉันจะทดสอบความเข้ากันได้ของการหรี่แสงได้อย่างไรก่อนที่จะอนุมัติคำสั่งซื้อผลิตจำนวนมากกับซัพพลายเออร์ของฉัน?
ในช่วงแรกของธุรกิจส่งออก เราได้จัดส่งไดรเวอร์ไปยังโครงการในอิตาลีโดยอ้างอิงจากเอกสารข้อมูลเพียงอย่างเดียว โครงการที่เจ็บปวดนั้นสอนเราว่าทำไมการทดสอบตัวอย่างจึงชนะฉลากความเข้ากันได้ทุกครั้ง.
ทดสอบชุดค่าผสมของตัวหรี่แสง ไดรเวอร์ และโหลด LED ที่คุณวางแผนจะติดตั้งจริง ใช้งานที่ความสว่างเต็มที่ ความสว่างต่ำสุด และผ่านการเฟดแบบช้าๆ เป็นเวลาอย่างน้อย 30 นาที สังเกตอาการกะพริบ เสียงฮัม โซนที่ไม่มีสัญญาณ การดับกลางคัน และจุดต่ำสุดที่ไม่สม่ำเสมอ ก่อนอนุมัติการผลิต.
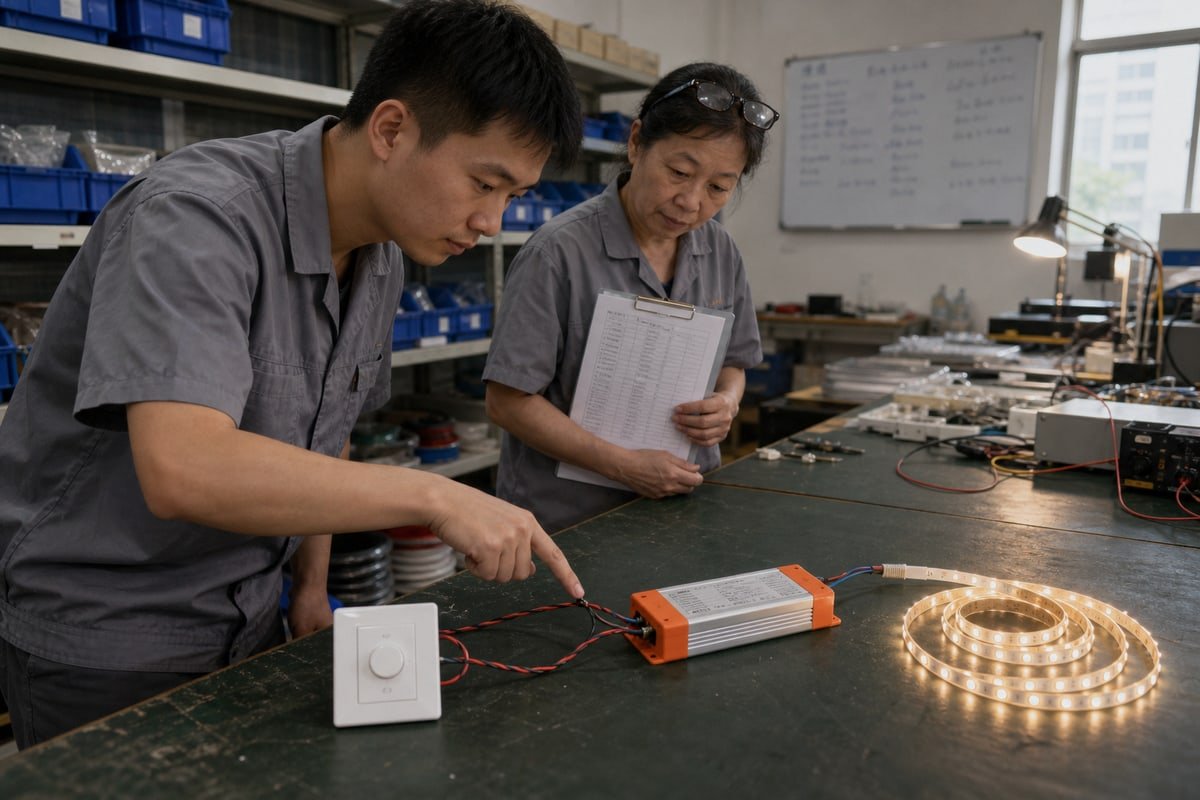
เอกสารข้อมูลสองฉบับที่ระบุว่า "TRIAC dimmable" ไม่ได้รับประกันผลลัพธ์ที่ดีเมื่อใช้ร่วมกัน ความเข้ากันได้แข็งแกร่งที่สุดเมื่อทั้งผู้ผลิตตัวหรี่แสงและผู้ผลิตไดรเวอร์ระบุรุ่นที่แน่นอนว่าผ่านการทดสอบร่วมกัน ใช้รายการเหล่านั้นเป็นตัวกรองแรก จากนั้นยืนยันด้วยการทดสอบจริง นี่คือขั้นตอนที่เราดำเนินการบนโต๊ะทดสอบของเราเองในเซินเจิ้นก่อนปล่อยชุดผลิตภัณฑ์ OEM และเป็นขั้นตอนเดียวกันที่ฉันแนะนำให้ผู้ซื้อทำซ้ำในฝั่งของพวกเขา.
- ขอตัวอย่างทอง (golden samples). รับไดรเวอร์รุ่นที่แน่นอนที่จะเข้าสู่การผลิตจำนวนมาก ไม่ใช่ต้นแบบจากห้องปฏิบัติการ การเปลี่ยนแปลงเล็กน้อยในขั้นตอนอินพุตระหว่างรุ่นสามารถเปลี่ยนพฤติกรรมการหรี่แสงได้.
- เดินสายไฟอย่างถูกต้อง. วางตัวหรี่แสง TRIAC เฉพาะด้าน AC หลักของไดรเวอร์เท่านั้น การควบคุมแบบ phase-cut ใดๆ บนด้าน DC ทุติยภูมิจะทำลายขั้นตอนเอาต์พุตและโหลด LED.
- โหลดตามความเป็นจริง. เชื่อมต่อจำนวนแถบ 12V หรือ 24V ตามความยาววงจรจริง ระดับโหลดเปลี่ยนพฤติกรรมของ TRIAC ดังนั้นแถบทดสอบยาวหนึ่งเมตรไม่สามารถพิสูจน์อะไรเกี่ยวกับการติดตั้งระยะสี่สิบเมตรได้.
- ไล่ช่วงการหรี่แสง. คงสถานะเปิดเต็มที่เป็นเวลาสิบนาที จากนั้นหรี่ลงถึงจุดต่ำสุด แล้วค่อยๆ เฟดขึ้นลงช้าๆ ถ่ายวิดีโอช่วงปลายต่ำด้วยกล้องโทรศัพท์เพื่อจับอาการสั่นไหวที่ตาคุณมองไม่เห็น.
- ทดสอบตัวหรี่แสงหลายยี่ห้อ. หากตลาดของคุณมีตัวหรี่แสงหลายยี่ห้อ ให้ทดสอบแต่ละยี่ห้อ ความสว่างขั้นต่ำอาจแตกต่างกันระหว่างตัวหรี่แสงแม้จะใช้ไดรเวอร์เดียวกัน.
- ตรวจสอบการสตาร์ทและกระแสไฟกระชาก. เปิดปิดวงจรยี่สิบครั้ง การป้องกันกระแสไฟกระชากที่อ่อนแอจะแสดงออกมาเป็นการสตาร์ทล่าช้า แฟลช หรือเบรกเกอร์ตัดวงจรรบกวน.
- บันทึกทุกอย่าง. บันทึกรุ่นตัวหรี่แสง หมายเลขซีเรียลไดรเวอร์ วัตต์โหลด และพฤติกรรมช่วงปลายต่ำ บันทึกนี้กลายเป็นเกณฑ์การยอมรับสำหรับคำสั่งซื้อจำนวนมาก.
เมื่อผู้ซื้อปฏิบัติตามขั้นตอนนี้กับเราก่อนเซ็นสัญญา ข้อพิพาทหลังการจัดส่งแทบจะหายไป เมื่อพวกเขาข้ามขั้นตอนภายใต้แรงกดดันด้านกำหนดเวลา เรามักจะต้องแก้ไขปัญหาผ่านวิดีโอคอลสามสัปดาห์ต่อมา.
ควรระบุข้อกำหนดโหลดขั้นต่ำและเส้นโค้งการหรี่แสงอย่างไรเมื่อจัดหาไดรเวอร์ CV สำหรับระบบ TRIAC?
ทุกไดรเวอร์ที่เราเสนอราคาเกี่ยวข้องกับการแลกเปลี่ยน: การจับคู่โหลดที่แน่นขึ้นช่วยปรับปรุงความลึกของการหรี่แสง ในขณะที่เผื่อกำลังเพิ่มเติมช่วยปรับปรุงอายุความร้อน การเขียนข้อกำหนดอย่างดีจะสร้างสมดุลทั้งสองด้าน.
ระบุข้อกำหนดโหลดขั้นต่ำของตัวหรี่ไฟที่ 20–40W ซึ่งกำลังไฟ LED ที่เชื่อมต่อต้องเกินกว่า ขนาดไดรเวอร์ที่เผื่อกำลังไฟไว้ประมาณ 120% เหนือโหลด เส้นโค้งการหรี่แบบลอการิทึมที่ราบรื่น จุดต่ำสุดใกล้ 1% และไม่มีโซนตายที่มองเห็นได้.
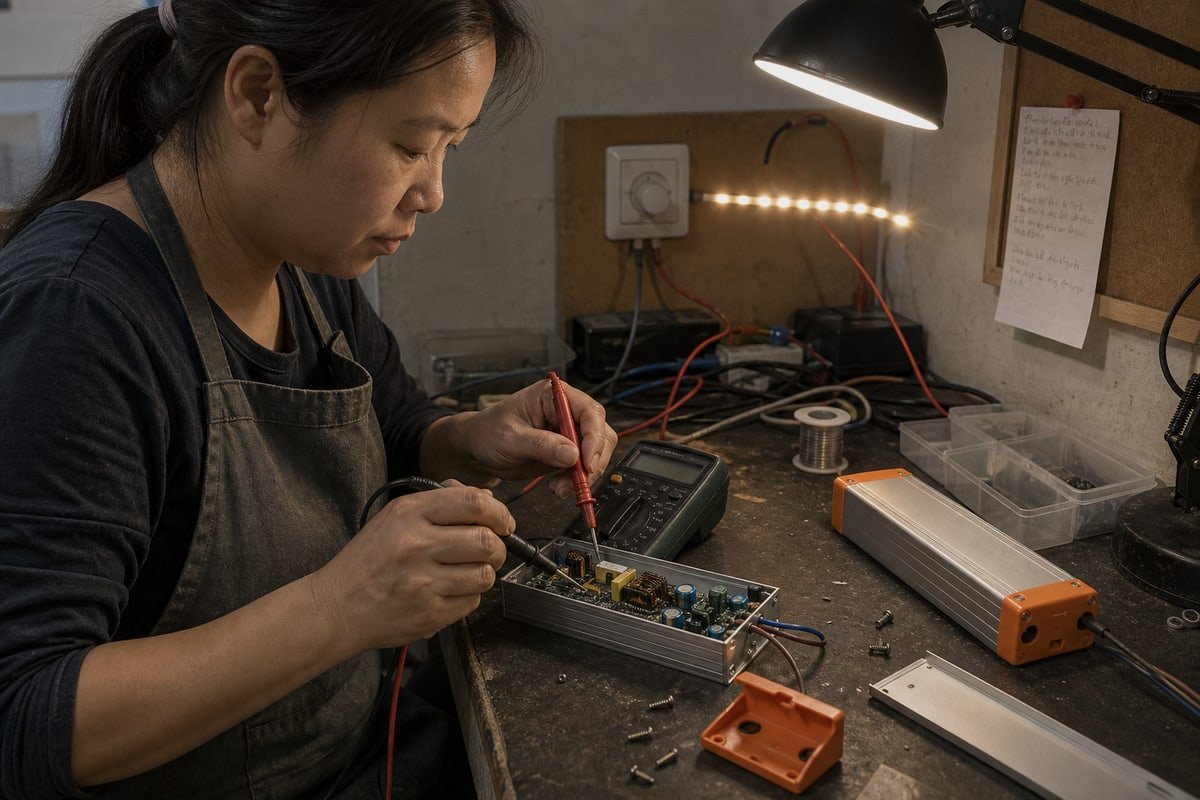
ข้อกำหนดโหลดขั้นต่ำเป็นบรรทัดที่ถูกละเลยมากที่สุดในข้อกำหนดการจัดหา TRIAC และทำให้เกิดการคืนสินค้ามากที่สุด ตัวหรี่แสงติดผนังหลายตัวต้องการโหลดเชื่อมต่อขั้นต่ำ โดยค่าที่อ้างอิงทั่วไปคือ 20W–40W สำหรับการติดตั้งบางประเภท วงจร LED ประสิทธิภาพสูงสามารถต่ำกว่าเกณฑ์นั้นได้ง่าย โดยเฉพาะในวงจรห้องนอนหรือทางเดินขนาดเล็ก เมื่อเกิดขึ้น TRIAC จะขาดพลังงานและไฟสั่นไหว ข้อกำหนดของคุณควรระบุวัตต์วงจรจริงที่เล็กที่สุดในโครงการและกำหนดให้มีการหรี่แสงที่เสถียรที่โหลดนั้น.
การกำหนดขนาดเกี่ยวข้องกับความตึงเครียดที่แท้จริงระหว่างกฎสองข้อ คำแนะนำบางส่วนสำหรับแถบไฟกำหนดเป้าหมายการโหลดไดรเวอร์ที่ 90–95% ของความจุเพื่อการจับคู่โหลดที่แน่นที่สุดและพฤติกรรมการหรี่แสงที่ดีที่สุด ในทางกลับกัน คำแนะนำด้านการจัดซื้อมักแนะนำกำลังไดรเวอร์ประมาณ 120% เทียบกับ โหลดโคมไฟ 4 เพื่อความปลอดภัยทางความร้อน ทั้งสองมุมมองมีข้อดี จุดยืนของเราหลังจากโครงการ OEM หลายปี: สำหรับหน่วยที่หรี่แสงแบบ TRIAC ได้ ควรเผื่อกำลังมากกว่า ไดรเวอร์ที่เข้ากันได้กับ TRIAC มักทำงานร้อนกว่าเวอร์ชันที่ไม่หรี่แสงได้ประมาณ 10–15% เพราะพวกมันกระจายพลังงานภายในเพื่อทำให้อินพุตที่ถูกตัดคงที่ นั่นคือเหตุผลที่ตัวเรือนของเราใช้โปรไฟล์ครีบระบายความร้อน การเผื่อกำลังเพิ่มเติมปกป้องอายุการใช้งาน; คุณสามารถรักษาคุณภาพการหรี่แสงช่วงปลายต่ำผ่านการออกแบบ bleeder แทน.
รายการข้อกำหนดที่ควรระบุในใบสั่งซื้อของคุณ
| ข้อกำหนด | ค่าที่ต้องระบุ | เหตุใดจึงสำคัญ |
|---|---|---|
| โหลดขั้นต่ำของตัวหรี่แสง | 20–40W ตามเอกสารข้อมูลตัวหรี่แสง | ป้องกัน TRIAC ขาดพลังงานและการกะพริบ |
| การเผื่อกำลังของไดรเวอร์ | ~120% ของโหลดที่เชื่อมต่อ | ชดเชยความเครียดทางความร้อนส่วนเกิน 10–15% |
| เส้นโค้งการหรี่ไฟ | ลอการิทึม (เรียบเนียนตามการรับรู้) | สอดคล้องกับวิธีที่ดวงตารับรู้ความสว่าง |
| จุดต่ำสุด | กำหนดไว้อย่างชัดเจน ใกล้เคียง 1% | หลีกเลี่ยงโซนไร้สัญญาณและการตัดขาดอย่างกะทันหัน |
| ความถี่ PWM | สูงกว่า 3kHz | รับประกันเอาต์พุตที่ปลอดภัยต่อกล้องและไม่มีการกะพริบ |
| ความเข้ากันได้ของช่วงการหรี่แสง | ทดสอบกับรุ่นดิimmer ที่ระบุชื่อ | รับประกันจุดต่ำสุดที่สม่ำเสมอในทุกยี่ห้อ |
คำเตือนสำหรับโครงการขนาดใหญ่
สำหรับการติดตั้งเชิงพาณิชย์ขนาดใหญ่ เพิ่มหมายเหตุเกี่ยวกับความอิ่มตัวของสายนิวทรัล การหรี่แสงแบบ TRIAC สร้าง โหลดที่ไม่เป็นเชิงเส้น 5, และกระแสนิวทรัลอาจเกินกระแสเฟสในหลายวงจร อาจต้องใช้ตัวนำนิวทรัลที่มีขนาดใหญ่ขึ้นเพื่อป้องกันความร้อนสูงเกินไป แจ้งให้วิศวกรไฟฟ้าทราบตั้งแต่เนิ่นๆ ถูกกว่ามากในแบบเขียนมากกว่าในท่อร้อยสาย.
บทสรุป
ฉลากที่ไม่ตรงกันทำให้เกิดการกะพริบ การคืนสินค้า และพลาดกำหนดเวลา จับคู่ประเภทเฟส ช่วงโหลด แรงดันไฟฟ้า และเส้นโค้งการหรี่แสง จากนั้นทดสอบชุดค่าผสมที่แน่นอนก่อนอนุมัติการผลิตจำนวนมาก.
เชิงอรรถ
มาตรฐาน ISO ให้กรอบงานสำหรับคุณภาพและความปลอดภัยในการผลิตอุปกรณ์ควบคุมไฟฟ้าและไดรเวอร์. ↩︎
Wikipedia ให้ภาพรวมทางเทคนิคของวิธีการหรี่แสงแบบ phase-cut รวมถึงการควบคุม leading-edge และ trailing-edge สำหรับโหลดต่างๆ. ↩︎
มาตรฐาน IEEE 1789 กำหนดขีดจำกัดสำหรับผลกระทบสโตรโบสโคปิกเพื่อความปลอดภัยและสุขภาพของผู้ใช้ในระบบแสงสว่าง. ↩︎
กรมพลังงานให้แนวทางเกี่ยวกับประสิทธิภาพของระบบ LED และการจัดการโหลดที่เหมาะสมสำหรับการใช้งานหรี่แสง. ↩︎
รายการ Wikipedia ที่เชื่อถือได้ซึ่งนิยามโหลดที่ไม่เป็นเชิงเส้นและผลกระทบต่อคุณภาพไฟฟ้า. ↩︎